7 TIG Welding Projects to DIY Today (With Pictures and Videos)
Last Updated on

One of the most precise and artsy ways to weld is using the TIG welding method. With its relatively low heat input, you can weld sensitive or thinner materials without fear of damaging them. It also requires quite a bit of finesse to make quality welds. Here are some relatively simple TIG welding projects to get you started, some of which are useful, and some are just for looks!
The 7 DIY TIG Welding Projects:
1. Coffee Cup
| Materials: | Stainless Pipe, Stainless Plate, Stainless Flat Bar |
| Tools: | Welder, Grinder, Dremel, Bandsaw |
| Difficulty: | Moderate |
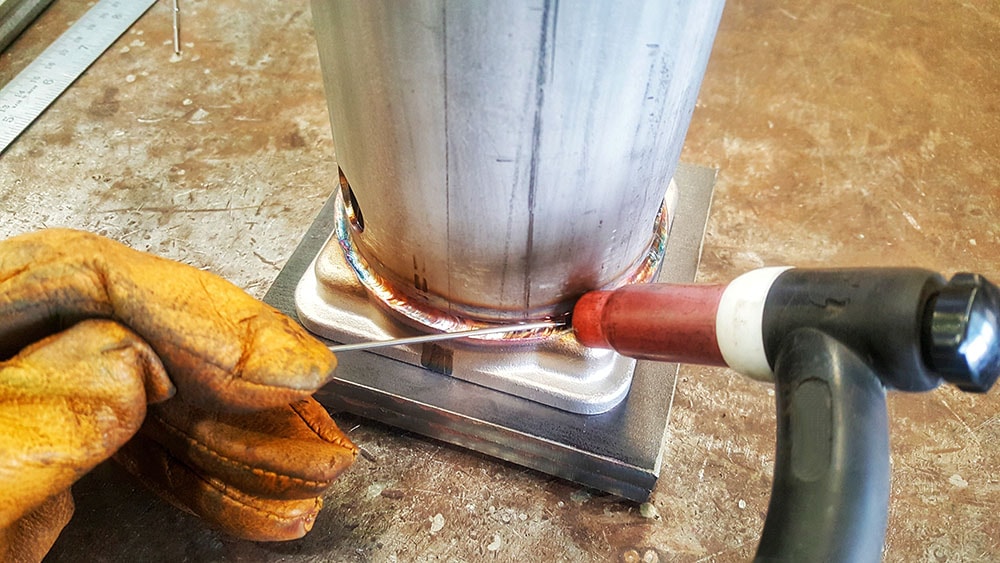
Why not make a stainless coffee mug complete with a design of your choice etched on the side? Cut a piece of stainless pipe with a bandsaw. It can be as large or as small in diameter as you like, but be sure that you’ll enjoy drinking from it! Then trace the circumference on a piece of stainless plate. Cut it out and grind it smooth on the edges; this will be the bottom of your mug. A piece bent flat bar then becomes your handle which is welded to the side. Although it’s optional, you can use a Dremel tool to etch a design and fill it in with weld afterward.
2. TIG Torch and Helmet Holder
| Materials: | Aluminum Square Tubing, Flat Bar, Bolts |
| Tools: | Pliers, Welder, Grinder, Drill, Tap, Bandsaw |
| Difficulty: | Moderate |
Cut out a section the same diameter as your TIG torch from a piece of flat bar. You can do this by first drilling a hole part way into the plate and then slotting it to the end of the plate by cutting it with a bandsaw or cutoff wheel. The piece that holds your helmet will be a simple piece of flat bar bent with about an inch of lip. The entire fixture gets fastened to a table by brackets that can be clamped.
3. Piggy Bank
| Materials: | Pipe, Pipe Fitting, Plate |
| Tools: | Welder, Grinder, Torch |
| Difficulty: | Moderate |
A large piece of the pipe becomes the main body where all your coins are stored. The pipe fitting becomes the snout where your coins come out. The legs are made of smaller pieces of pipe that are beveled so that they angle outward from the body. A couple of nuts are tacked on for the eyes, and cut pieces of plate form the ears. There’s no breaking this piggy bank.
4. Tote Tray
| Materials: | Aluminum Diamond Plate, Aluminum Round Tubing |
| Tools: | Welder, Grinder, Step Drill, |
| Difficulty: | Moderate |
One of the hardest things about TIG welding is controlling heat distortion. Pay attention to how many tacks the welder puts in place on all of the joints before he even begins welding. This is very important to keep all of your parts straight. Another thing to remember is that since aluminum is somewhat porous, it can get “gummy” when drilled. This is why a step drill is preferred to drill the holes for the handle.
5. Steel Cube
| Materials: | Thin Gauge Stainless Steel |
| Tools: | Welder |
| Difficulty: | Easy |
Whether you need a paperweight or just like cubes for some reason, this is excellent practice. Welding outside corner joints is hard enough for beginners, but TIG makes it easier. Be sure to put enough tacks before you begin welding. One helpful tip is to hover your TIG torch over the weld to ensure that the post-flow of gas helps prevent porosity as the weld cools.
6. Chevrolet Bowtie
| Materials: | Thin Gauge Aluminum, Pipe, Bolt, Nut |
| Tools: | Welder |
| Difficulty: | Difficult |
Some designs are so simple yet evoke so much emotion. For some people, it’s the Chevy bowtie. Maybe it reminds them of summertime or spending time with their grandpa camping. Whatever it is, you can capture some of that and make the classic symbol for yourself. Start by tracing the shape and then cutting it, adding piece by piece to create a three-dimensional bowtie. A pipe is added on the back with a hole drilled out so you can fasten it to your truck or trailer.
7. Picture Frame
| Materials: | Round Tube |
| Tools: | Welder, Grinder, Dremel, Bandsaw |
| Difficulty: | Easy |
This project doesn’t require any actual welding. Well, if you count fusing with a TIG torch, then it counts as welding. This picture frame is simply four pieces of round tube mitered at 45-degree angles and fused together at the joints. That’s it. This is perfect for a beginner or even someone who can’t weld. However, the nice thing about TIG is that even a little fuse looks clean and swanky.
Conclusion
One thing that should be mentioned, since it’s not often discussed in these tutorials, is that metal can become contaminated. Whether working with stainless, mild steel, or aluminum, it’s generally a good idea to keep grinding wheels for separate applications. If you get some mild steel into your stainless, there’s a good chance you will start seeing rust. That is part of the sensitive nature of working with these metals.
Featured Image Credit: Go ahead, Shutterstock
