6 DIY Welding Positioner Plans You Can Assemble Yourself (With Pictures)
Last Updated on

Are you working on a DIY welding project in the next few days? If yes, these DIY welding positioner plans will be helpful to you!
A welding positioner prevents the flame from getting into contact with any combustibles. Also, it ensures that the cutting, welding, and heating operations are safe and efficient.
Making your welding positioner isn’t as challenging as you might think. You only need to have a plan, follow instructions, and take your time to make it.
If you’re looking for some inspiration on building your DIY welding positioners, you’re in the right place. Here are eight DIY welding positioners plans you can assemble yourself. It’ll give you the confidence to tackle your next welding project from a do-it-yourself perspective.
The Top 6 DIY Welding Positioners Plans
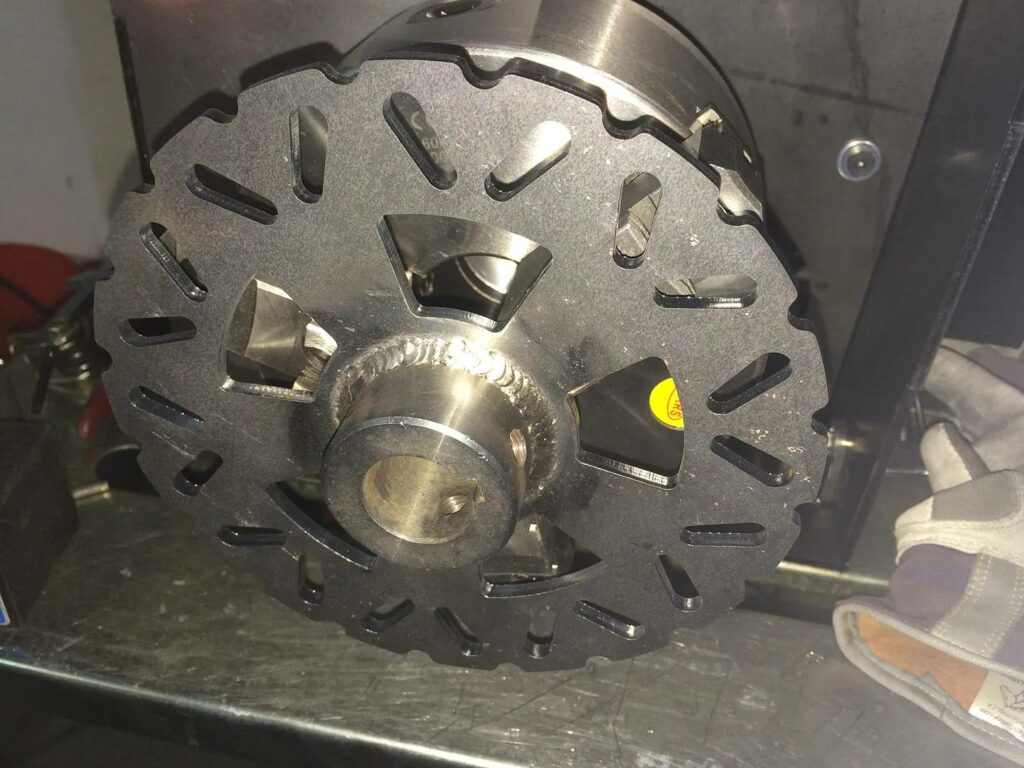
1. DIY Rotary Welding Positioner by forum. welding tips and tricks
| Materials Needed: | Servo motor, DC motor, aluminum sheet, steel plate, and an encoder. |
| Tools Needed: | Tape measure, screwdriver, pliers, drill and drill bits, and wrench. |
| Difficulty Level: | Easy |
With the DIY rotary welding positioner, you can use TIG or MIG welding processes easily. There are three different ways to adjust the angle of the workpiece during machining operations. Also, there are two different ways to tilt the spindle head. One uses ball bearings, while the other uses linear bearings with anti-backlash springs between.
This welding positioner uses a rotary table. Here, the pipe is clamped and rotated to the appropriate angle. Also, it’s an ideal welding positioner for welded pipe fabrication. It allows for high-quality welds without distortion or overheating of the metal.
All its components are made from steel plates, angle iron, and pipe fittings. So, they’re strong enough to handle heavy equipment.
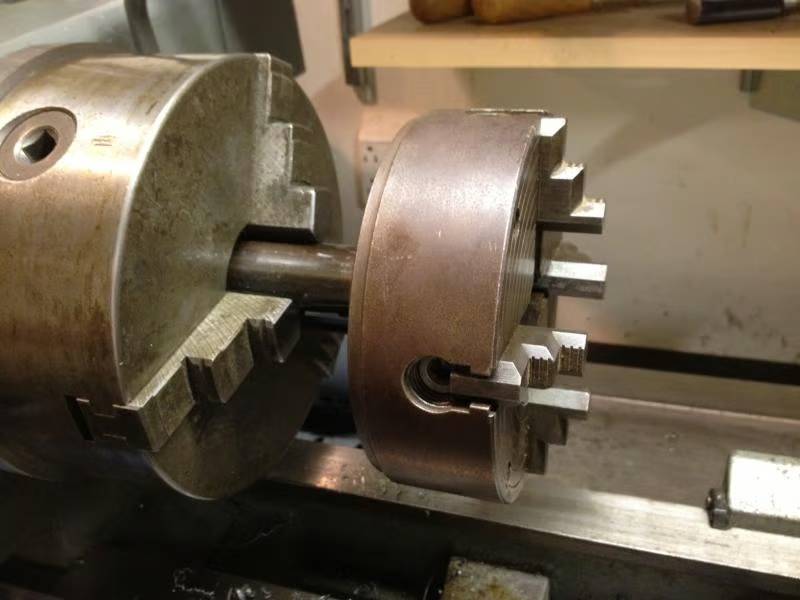
2. DIY Ball Swivel for Vise/Welding Positioner by Youtube
| Materials Needed: | A hitch ball, bolts, washers, nuts, penetrating oil, a pair of grips, and a lathe. |
| Tools Needed: | Drills, sander, wrench, portable band saw, torch, center punch, and hacksaw. |
| Difficulty Level: | Easy |
If you want to build a DIY welding positioner, this is an excellent place to start. You can use this ball swivel to check if your workpiece is level and square. This device is a must-have for any DIY welder who needs to get into tight spots and weld on irregular shapes.
The ball swivel welding positioner allows you to rotate the workpiece, making it easy to align with your welding machine. You can use this setup for small pieces of metal that need welding or soldering.
You can also use it in other DIY projects, such as woodworking projects where you need to keep things level and square.
The primary advantage of this DIY welding positioner is that you can use it in any position. So, don’t worry about finding an excellent spot for it. It’s also cheap and easy to assemble. It’s perfect for those who aren’t afraid to get their hands dirty!
3. Welding Positioner DIY by Youtube
| Materials Needed: | Bolts, nuts, thick steel plate for the base, a holder block, two pairs of clamps, and hooks. |
| Tools Needed: | Phillips screwdriver, wrench, electric drill, tape measure, and pliers. |
| Difficulty Level: | Beginner |
Do you want to assemble a simple DIY welding positioner? If yes, this is an excellent place to start! This welding positioner will hold your workpiece steady while you weld. It also allows you to make adjustments as needed during the process.
You can use it with any welding machine, including TIG and MIG welders. It uses clamps instead of expensive motors or hydraulics. So, it’s more affordable than many other options out there!
Also, it features adjustable jaws. They allow you to clamp on anything from small pieces of metal up to two inches thick. It also comes with an adjustable headstock. This way, you can move it around as needed without repositioning the whole thing manually each time.
You can assemble this positioner with just some basic tools and supplies.
4. Welding Positioner Build by Pirate 4×4
| Materials Needed: | Clamps, aluminum frames, ball bearings, and a welding positioner build kit. |
| Tools Needed: | Sealing tape, adjustable wrench, screwdriver, needle nose pliers, sandpaper, and drill. |
| Difficulty Level: | Advanced |
This welding positioner is a little more complicated to build than others, but it’s still easy to assemble. The only challenge is getting all of the components to fit together well. But if you follow the instructions carefully, this shouldn’t be challenging.
This welding positioner helps you get the correct angle and height for your weld. It makes your finished product look more professional. It allows you to adjust the height of your weld table, giving you more control over your welding process. You can fine-tune your setup and weld at any angle if needed.
5. Homemade Rotary Welding Positioner by Youtube
| Materials Needed: | Clamps, aluminum alloy plate, a steel bar, steel pipes, and a motor. |
| Tools Needed: | Vice grips, socket wrench, screwdriver, a measuring tape, and a bandsaw. |
| Difficulty Level: | Moderate |
This homemade rotary welding positioner is designed using a gear motor, an aluminum plate, and some nuts and bolts. The base is made from any material as long as it is sturdy enough to hold the weight of your project. You can use wood or metal for this purpose.
This positioner allows you to rotate your workpiece while welding it. Also, you can weld in any direction. It makes it easier to weld long pieces of metal.
You can also use a homemade rotary welding positioner to create a welded joint with a specific angle. If you have ever tried welding something like this before, you know how challenging it can get.
An additional benefit is that it makes the welding procedure much cleaner because there’s no contact between the flame and the welded workpiece.
6. Arduino Home-Built Rotary Welding Positioner by Youtube
| Materials Needed: | A DC motor with encoder, servo motor, Arduino Uno, battery pack, and a battery holder. |
| Tools Needed: | Hand drill, soldering iron and solder, wire stripper, and electrical tape. Other tools are a screwdriver, needle nose pliers, diagonal wire cutters, small vice grips, and sandpaper. |
| Difficulty Level: | Advanced |
The Arduino Home-Built Rotary Welding Positioner is a DIY project that you can use for rotational welding. The positioner uses an Arduino Uno and several sensors to control the welding angle. Rotate a knob until you get the desired angle when using this welding positioner. Then, you can save it for future use.
This rotary welder is one of the most helpful tools for amateur DIYers and anyone who wants to fabricate their metal parts. Usually, it’s used for metalworking, but you can use it for many other applications where precise positioning is needed.
The unit includes a rotary base with a servo motor that drives the rotary axis. Also, the rotary axis has an encoder attached to it that gives feedback on the position of the axis.
Benefits of Using Welding Positioners
A welding positioner is a crucial tool for any welder. It is needed wherever you use an acetylene or natural gas torch during cutting, welding, and heating applications. It prevents the flame from getting into contact with any combustibles.
It also helps you get a better weld at the right angle and position. It ensures that the welding process is as safe as possible.
Here are some benefits of using a welding positioner:
Reduces Fatigue
Welding is hard work. It can cause severe physical strain if you don’t have suitable equipment. A welding positioner allows you to stand while working. This way, you can avoid fatigue and injuries caused by sitting or lying down in one place for too long.
It Makes It Easier to Get the Right Angle
Forget about getting the right angle on your own and use a welding positioner instead! This tool has adjustable arms. They allow you to move them into place easily. This way, your angle matches with your weld joint each time perfectly. Besides, these arms are also spring-loaded. They will return to their original positions automatically when released.
It Keeps You Safe
Using a welding positioner will help keep yourself and others safe when working on welding projects. It’s especially helpful when you need to hold pieces of metal in place while welding them together.
You won’t need to lean over the part or hold it with one hand while welding it with the other hand. Doing this can cause severe injuries if something goes wrong during the process. These devices will allow you to stay upright and out of harm’s way while still getting the job done.
It Prevents Distortion
The primary purpose of welding positioners is to level the material you’re working on. You don’t have to worry about it falling over or warping when you start welding.
Without a welding positioner, you would need to build your jig for each project. It can be time-consuming and challenging.
Improves the Quality of the Weld
Welding positioners are used to improve the quality of welds and make them more consistent. It ensures that the welding wire is in the correct position throughout the entire process; thus, you can easily achieve a better weld geometry.
Conclusion
Welding positioners are expensive professional tools that expert welders use to make sure they have a clean and healthy weld. Luckily, you don’t have to spend hours on the computer sifting through thousands of pages trying to find a suitable welding positioner. We did it for you and came up with these eight DIY welding positioner plans that are easy to assemble.
You only need some basic tools and supplies. With these and a little expertise, you’ll have yourself a homemade welding positioner within a short time. Of course, these welding positioners are not as powerful as big machines, but they’ll get the job done. Get your DIY welding positioner plan now and start building!
Featured Image Credit: JulianFGuevara, Shutterstock