How to Clean a Welding Helmet: 9 Tips and Tricks
Last Updated on
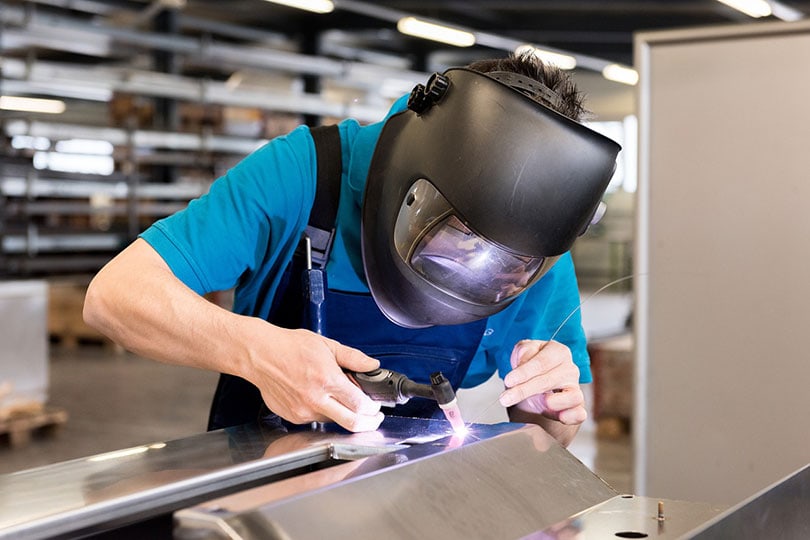
Whether you are a welding hobbyist or a welding guru, a welding helmet will enhance your safety and productivity. However, regular usage exposes the helmet to welding debris and weather elements, hindering a welder’s visibility. Talk of dirt, smoke, fumes, and other welding debris piling up on a helmet’s surface and lenses, compromising its functionality.
Regularly cleaning your welding helmet can remedy this. But which is the right way to do this? This article will explore the tools required, a step-by-step guide on the proper method of cleaning, and common mistakes to avoid when cleaning a welding helmet.
Why You Need to Clean a Welding Helmet
Besides practicing proper hygiene, cleaning a welding helmet will prevent unnecessary expenditures incurred in replacing worn-out parts. Some of these parts, like the helmet lenses, can be quite costly. Repair services for dented helmet hoods are also quite costly.
Also, a helmet in a clean condition enhances safety and productivity. Moreover, regular maintenance will significantly increase the helmet’s life span.
So, when you notice some dark spots beginning to form on your helmet lens, it’s a sign that you need to clean it. Experts recommend daily cleaning to reduce the risks of injuries that are common in the welding sector. In fact, a report from U.S Risk indicates that over half a million workers in America suffer from welding-related accidents, some of which are attributed to poor visibility on an unkempt helmet.
Tools Required for Cleaning a Welding Helmet
The tools required for the cleaning process depend on the composition of the materials used to make the helmet. For instance, cleaning a nylon helmet will be different from a leather or metal one. You also have to consider the type of helmet (whether solar-powered or battery-powered) and the overall condition of the helmet.
- A soft cloth or tissues
- Wet wipes
- Plain room temperature water
- A smooth bristled brush
- A special helmet cleaning solution that’s safe for lenses
Besides the cleaning accessories, there are more tools that you may require to complete the cleaning process. These include screws, screwdrivers, and batteries. Remember, this all depends on the type of welding helmet that you own. Consult the owner’s manual to confirm whether your helmet may need some sort of specialized cleaning tool to assist in the process.
The 9 Steps to Cleaning a Welding Helmet
While some may consider cleaning the helmet a tasking chore, it is a necessary endeavor that should not be ignored. If you follow these nine quick and easy steps, you can have your helmet spotlessly clean in a matter of minutes.
1. Start with the Lens
The lens tends to be the dirtiest component, so it’s the first part you should focus on. All the welding debris such as fumes, smoke, and dust particles settle on the lens, inhibiting visibility. Fortunately, the lens is the easiest part to clean. But you have to be extra careful because it is covered with protective layers against UV/IR radiation.
Start by gently taking out the lens. In standard welding helmets, the lens usually comes out by itself, but if you are dealing with the modified version that’s equipped with screws, you will need a screwdriver to pry the lens out.
Proceed to wipe it gently with a soft-bristled brush to remove any dust particles. Then, inspect it to determine the next process to undertake. If it is regularly cleaned and maintained, it’s unlikely to have accumulated a lot of grime.
However, if the lens is rarely cleaned, it’s likely to have those stubborn dust spots that won’t just come off. You may need to utilize a special lens solution to get rid of any remaining dirt buildup. Spray the solution to the lens surface, then use a tissue or soft cloth to wipe it off the lens. Use small circular motions to delicately clean it.
https://www.instagram.com/p/Ch2m4HBO80s/
2. Inspect the Helmet
After cleaning the lenses, proceed to inspect the rest of the helmet components. Start from the bottom front of the helmet, working your way up to the top and the rear end. This way, you will determine if there are areas you need to pay special attention to when cleaning.
The inspection also helps you determine whether the helmet has experienced any severe damage while in use. This information will give you an overall idea of the state of your helmet and the next step to undertake. In case your helmet is multi-layered, separate each component to allow for easier cleaning.
3. Clean the Dust
After inspecting the helmet, continue to wipe off any grease and dirt sediments from the rest of your helmet. This is necessary even if the helmet appears dust free. Just as in lens cleaning, use a soft-bristled brush to wipe the helmet in small circular moves to remove any dust off of places like the vents, shell parts, and the inside of the helmet. If you don’t have a soft-bristle brush, you can use wipes, but a brush is better suited for reaching the hidden crannies.
Do not use ordinary solutions to clean a welding helmet. If you are not satisfied with the work of the soft-bristle brush, you can simply use clear water and a soft cloth to clean your helmet. But if you have a special solution that is safe for the lens, you can go right ahead.
4. Use Air Pressure Duster to Remove Extra Dirt
After dusting off the helmet, some dust particles are likely to settle back on the surface. In such a situation, you can use an air pressure duster to remove them again. An air pressure duster will not only remove dust remains, but it will also clean the hard-to-reach areas of the helmet.
https://www.instagram.com/p/tLR30_rqhK/
5. Apply Helmet Cleaner
If some grime and dust particles still linger on the helmet’s surface, apply some drops of helmet cleaner, and gently wipe them off with sifting hands. The cleaner not only removes the leftover dirt from the helmet, but it also gives it a lovely fragrance.
6. Disinfect the Helmet
This is an equally important step in the cleaning and maintenance process of a welding helmet. It gets rid of all germs and viruses that may have invaded your safety equipment.
While at it, it is better to disinfect the whole welding hood using a cleaner spray instead of a lens cleaner. Cleaner sprays will ensure that your lenses are cleaner and better protected from germs and other harmful organisms.
7. Dry the Helmet
After you have brushed, cleaned, and disinfected the helmet, the next step is to wipe through with a dry clean towel. This is to remove any residual dirt and moisture from the helmet’s surface.
Using a thick bathroom towel, make large movements along the surface of the helmet. Don’t exert a lot of pressure when toweling.
To prevent any future weld spatter from sticking on the helmet’s surface, apply a wax coat. The wax will make the surface slicker, making future cleaning endeavors a whole lot easier.
8. Tighten Any Loose Screws
Sometimes the screws used to assemble the different components of a welding helmet can get loose. This is especially common for helmets that are regularly used. So, after you have cleaned and dried your helmet, give it a final inspection to make sure all the screws are present and are tightly secured. If you encounter a loose screw, you can use a screwdriver to tighten them.
9. Store Your Helmet Properly
After you have gone through the cleaning process and ensured that all components are tightly secured, the final process is to store the welding helmet safely in an area with minimal exposure to dust, sunlight rays, and extreme temperatures. The space should also minimize the risks of lens and visor damage.
Some helmet brands are thoughtful enough to provide a helmet bag accessory. You can also purchase one from a local welding store if the need arises. These helmet bags are designed to offer a secure space for storing and transporting welding helmets.
What to Avoid When Cleaning the Lens of a Welding Helmet
Before you embark on the cleaning process, it is essential to read the manufacturer’s manual and understand the basic instructions. Different helmets require different techniques, so you cannot use the same cleaning procedure on all kinds of helmets. The manual will provide you with a reference source in case your helmet needs specific cleaning requirements.
Exercise extreme caution when cleaning the helmet lens. Even common mistakes can result in significant loss, and you could even end up replacing the lens. Here are a few common mistakes that you should avoid when cleaning the lens of a welding helmet.
Failure to Remove the Batteries
If you own a battery-powered welding helmet, be sure to remove the batteries. Otherwise, they risk getting damaged during the process. These batteries should be replaced after the cleaning process. Also, avoid brushing the battery slots.
Using Hard and Brittle Brushes
Never use stiff bristles when cleaning the helmet lens, whether it’s a passive or auto-darkening welding helmet. Instead, you can use a soft bristle brush such as microfiber towels because the lens only comes into contact with the soft cloth.
Still on this point, never use a scrub brush on a helmet lens because they are very likely to scratch the lens and reduce its functionality. After you have removed the initial dust layer, consider switching to a soft-bristled brush in your next step for thorough cleaning.
Applying Pressure on Lens
It is essential to gently wipe the surface of the lens without exerting any pressure while cleaning. Small circular motions are more effective in getting rid of the dust build-up compared to expansive jerky movements.
Big strokes could damage the lens, and eventually, you may be forced to replace it with a new one. Solar-powered welding helmets need extra caution because of their sensitivity to heat and light.
Final Thoughts
Good visibility is a vital aspect of the welding process. Grime and dirt are bound to accumulate on the surface of a helmet from regular usage. Regularly cleaning your helmet will enhance safety, productivity, and increase the helmet’s durability. Cleaning helmets will also reduce unnecessary expenditure from repairs.
When cleaning the lens, gently wipe the surface using a soft-bristle brush to wipe off any dirt or dust particles. Also, ensure you don’t exert excessive pressure on the lens. You can use a soft brush or cloth to wipe the helmet’s surface. Use an air pressure duster or a helmet cleaner to remove the stubborn stains.
After the cleaning process, you can dry your helmet with a dry towel to remove any residual moisture or dust particles and tighten the screws. Finally, store it in a secure place for future use. Remember to store the helmet away from extreme temperatures, dust, and direct sunlight rays. And there you have it, a simple and effective cleaning procedure for your welding helmet.
Featured Image Credit: People Image Studio, Shutterstock