How to Fix Cast Iron Without Welding - 3 Methods & Guides
Last Updated on
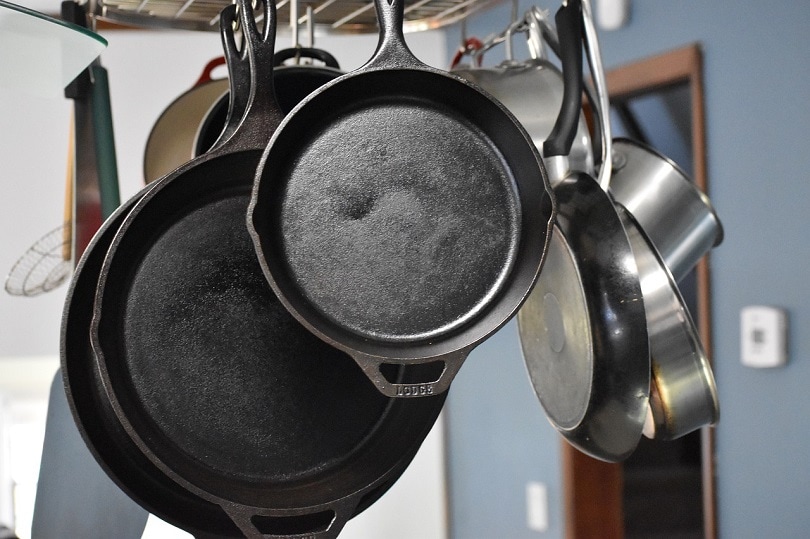
Cast iron is utilized in many industrial and household structures. It is a vital useful material used in a wide range of ways, from stoves to engines. By nature, cast iron is brittle. However, it can be susceptible to breaks and cracks if not well maintained. Cracks on cast iron may be brought about by thermal gradients, massive swings in temperature, and physical shocks resulting from dropping it on a rigid surface. It can be frustrating and stressful when your equipment made of cast iron cracks. Luckily, this can be fixed with less time and hassle.
Although you can fix cast iron pieces through welding techniques, it can be challenging as you could end up causing further damage in the process. There are several ideal methods that you could use to repair cast iron that does not require welding. Such techniques include brazing, the use of epoxy putty, and the use of cold metal stitching.
It is recommended that you use ideal methods when repairing your cast iron pieces. Using the wrong technique could cause further damage to your work, making it impossible to repair. Although welding is a commonly preferred method to join pieces of metal, it may not be ideal for some cast iron pieces requiring some technicalities.
This piece will give you the much-needed insight into how you can fix cast iron pieces without welding.
Let’s get to it.
How to Fix Cast Iron Through Cold Metal Stitching
Cold metal stitching is ideal for fixing cracked cast iron that cannot be repaired via conventional methods, such as welding. This technique implements specialized inserts that connect damaged metal regardless of the nature of the crack. The different pieces of the cast iron separated by the crack are laced up through cold metal stitching.
Cold metal stitching is a popular method, and it is an ideal repair solution for structures that cannot easily be replaced or dismantled. Construction workers can also use this method to restore old buildings to preserve the original architect and handiwork.
Unlike welding, this method is also suitable for repairing ships and railway road locomotives. When the ship’s engine blocks, rather than replace it with a new one, you can use the cold metal switching to mend it. This procedure is popular in construction, automotive industries, mining, large engine machinery, transportation, and many other essential applications.
The following is a step-by-step procedure on how you can repair cast iron by cold metal stitching.
1. Diagnosis of the Cast Iron Crack
Considering the crack in question is the first step in the process of cold stitching. This method is ideal for cast iron pieces with a thickness of 3/16 inches up to 1 foot. The length of the crack does not matter. The nature of the crack will determine whether it can be fixed or you need to create another iron cast piece entirely.
2. Drilling of the Holes
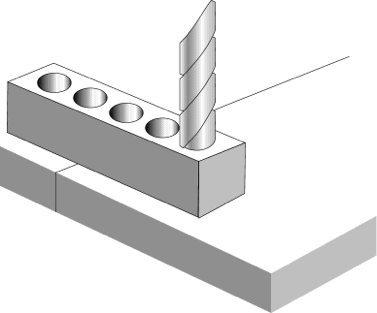
The second step in the cold metal stitching procedure is drilling holes along the crack. The holes should be spaced out at regular specified intervals. For best results, a guide is recommended for accurate drilling of the holes along the crack. The set of the holes should not necessarily have the same number in total. The idea is to make stitching points that are strong to hold the cracked cast iron together.
3. Joining the Rows of Holes
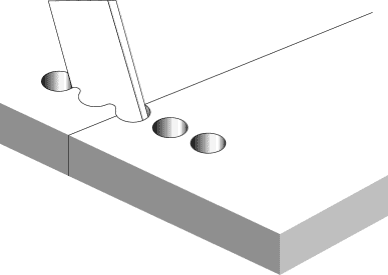
After drilling the stitching holes, you will then be required to join them together. To strengthen the cracked cast iron, the holes will make it straightforward to insert the keys. You will need a giant chisel to join the holes without creating a slot in the metal. The round shoulders of the holes that have been drilled will serve as holding points when the keys have been inserted. It is vital to maintain the outer diameter of the drilled holes while still joining them.
4. Inserting the Metal Stitches or the Metal Keys
The most vital component of this process is the metal keys. They offer the strength required in holding the cracked parts together after the repair. High-strength metal is significant in cold metal stitching. Otherwise, you will have to repeat the procedure as it may be ineffective.
Ideally, the drilled holes in the first step should be of the same length as the metal keys. By doing this, the metal keys will add much-needed strength across the entire surface of the cast iron, thus preventing further cracks from occurring. There should be a snug fit between the drilled holes and the metal keys to create a solid bond. There should be no play between the metal keys and the original piece.
When there is excess material from the original part surface, you should not worry about dealing with the excess materials through the finishing process.
5. Sewing the Stitches Together

It’s not enough to depend on the inserted metal keys in the cracked cast iron piece. This is because they may not be strong enough to withstand intense pressure and heat; thus, they may break. Thus, you will need to connect screws between the metal keys. Put them relatively close to the neighboring screws and the metal stitching keys that you have installed. The bond between the repaired metal and the cracked cast iron can be more robust after tightening the stitches.
Just as with the metal keys, it’s okay if there is excess metal that may be sticking up from the screws that have been installed. The excess material will come in handy when finishing the surface; it will appear as one whole cast iron piece. Lining up the flush with the original cast iron piece’s surface will help eliminate weak spots and the reoccurring crack chances.
6. Removing the Excess Material
The final step of the cold metal stitching process involves chiseling away the excess material from the stitching screws and the metal keys you’ve inserted. Using the chisel, remove as much metal material as you can. A tool for grinding is then used to sand the rest down. Refinishing is vital as it helps to restore the cast iron piece as it was initially. The evidence of repair must be hidden beneath the excess metal for a clean outlook.
https://www.instagram.com/p/CdQHGIrpfg1/
Use of Epoxy Putty to Repair Cracked Cast Iron
Proper maintenance of your cast iron pieces should be done to prevent them from easily cracking. It would be best if you also kept it under dry conditions to prevent it from rusting. However, should any cracks occur, you can fix the cast iron pieces using epoxy putty using the following step by step procedure.
- First, buy epoxy putties such as Quick Steel or JB Weld at your local hardware store. These two types of epoxies will serve as glue and will adhere to cast iron and fill the crack with a safe seal.
- Using 80-grit sandpaper, sand the cast iron to remove any paint and rust that might be covering the crack. To avoid widening the crack, use back-and-forth motion instead of circular movements. This process helps clean the iron cast surface by removing substances on top of the crack.
- Using a rag, water, and soap, thoroughly clean the cracks and the surface area. Before continuing, allow the cast iron to dry.
- While following the instructions of the manufacturer, stir the epoxy. Onto a flat surface, squeeze some out. You may use a putty knife and a scrap of cardboard to mix it.
- The mixture of the putty is then spread into and over the cracked cast iron. You should ensure that you scrape off the excess mix using a putty knife before it dries. It is recommended that you wait for 24 hours before handling the repaired cast iron.
- The final step in repairing cast iron pieces with epoxy putty is painting over the sealed crack. This helps to enhance durability and ensure that the repaired cracked part matches the rest of the cast iron piece.
Use of Brazing to Fix Cracked Cast Iron
Although cast iron is a rigid material, it is prone to breaks and cracks. Another effective way the cracks can be fixed without welding is brazing. Unlike the traditional welding technique used to repair metal items, brazing uses minimal heat to fix your cast iron pieces. This technique is commonly used to correct cracks on cast iron items.
- A filler rod is selected depending on the application of the part of the cast iron. Filler bars that are used for brazing of cast iron are often made from brass or nickel. Some fabricators and metalwork specialists use filler bars with flux, while others prefer different flux during brazing.
- After choosing your preferred filler bar, you must prepare the crack surface on the cast iron piece. Before brazing, the surface of the crack must be thoroughly cleaned to remove oxides and impurities. Using a grinder, the crack surface should be ground out to form a cross-section that is U-shaped. This procedure allows the brazing material to avoid stress concentrations and fully flow into the crack.
- A stainless steel brush should be used to brush the ground area after grinding the cast iron piece. This procedure helps to ensure that any particulate that was left after grinding is removed.
- The cast iron part is then supposed to be heated. Attempting to use a brazing torch on the cast iron’s cooler parts may cause further warping and cracking. Thus, other types of heat sources such as a weed burner, an oven, or a gas grill can be used to slowly heat the cast iron part.
- The piece of the cast iron is then placed onto a work surface and braced if necessary. During the brazing process, some significant parts may need heating, especially if the crack is substantial, and the process of brazing may take time. To maintain the temperature of the piece, it is recommended that you use an external heater.
- You are then required to heat the crack’s surface by using a brazing torch to the point that it turns to bright red. The filler rod is then placed onto the crack surface. For an effective brazing process, it is recommended that the surface temperature be extremely hot to enable the material of the filler bar to flow into the crack easily. While progressing down the crack, you may use the brazing torch to maintain the local temperature.
- Finally, place the repaired part into a container full of sand and cover it entirely with sand. After the brazing procedure, the fixed amount of the cast iron should be cooled very slowly. The cast iron may crack if it’s left out in the air to cool down. It is recommended that you leave the repaired part for at least one day in the sand and longer if the domain is significant.
How to Prepare Your Cracked Cast Iron Piece Before Repairing It
Buying a new cast iron piece may be costly; thus, you should consider repairing it. Once you decide to repair your cast iron, regardless of the methods mentioned above that you may want to use, you should thoroughly clean it to eliminate dirt, grease, and oxides.
The following is a guideline on how you could clean cast iron pieces before fixing them.
Apart from cracking, your cast iron items may get rusty or burnt. If your cast iron piece is burnt, you could first start by spilling salt on its surface. You can use a scrub or a soft brush to cleanse the surface. For more effective cleaning, it is ideal that you use a damp brush. However, you should use a plastic scraper if the burn is stubborn to eliminate burnt substances on the surface.
If your cast iron piece is rusty, you may use a scrub and detergent to get rid of the rust. The rust could damage your cast iron item if not eliminated on time. Seasoning may also be a remedy if the rusty levels are high.
Supposing your cast iron item that has cracked is discolored, you may thoroughly scrub it with steel wool to remove any particles on it. This helps to eliminate any traces of dirt on your metal piece. After scrubbing, wash your piece with soap and warm water and leave it to dry. The color of your cast iron piece will be restored.
After your iron cast piece is clean and dry, you could grind it to eliminate defects such as porosity, making the cracked surface ready for repair.
Bottom Line
Cracked cast iron is not the end of your piece; you can quickly repair it and restore it to its functionality. You do not necessarily need to use welding. Some of the methods you could use to fix it include epoxy putty, cold metal stitching, and metal brazing following the procedures discussed above. With this, now you can get up and restore your cracked cast iron effectively.
If you need to do other bonding work without welding, check out some of our other how-to guides below:
- How to Replace Rocker Panels Without Welding
- How to Bond Metal to Metal Without Welding
- How to Fill Holes in Metal without Welding (Quick & Easy)
Featured Image Credit: Ernest_Roy, Pixabay