How to Weld Plastics - A Complete Guide (With Pictures)
Last Updated on
Plastic welding is the process of joining softened thermoplastics surfaces using heat. When compatible thermoplastics are subjected to heat, they create a molecular bond that subsequently leads to plastic formation. During production, you have to press the surfaces, subject them to heat and pressure, and then cool off.
The heating techniques used are responsible for the different types of plastics available. Other than the welding method chosen, there are more factors that dictate the quality of the plastics produced. For example, how weldable are the base materials? Before you embark on the welding procedure, take time to examine if the base materials are pliable enough to produce your desired end product.
Manufacturing plastics is inevitable since they are widely used globally, from simple to sophisticated ones. Examples of simple plastics are disposable cutlery, vinyl toys, and light storage tins. The sophisticated forms include medical equipment, internet cables, and construction pipes.
How To Weld Plastic: Essential Steps
Creating a perfectly blended plastic can be a painstaking task, especially if you are a novice. However, this process can be easily achieved by following the steps mentioned below.
1. Begin by Cleaning and Setting Up the Working Space
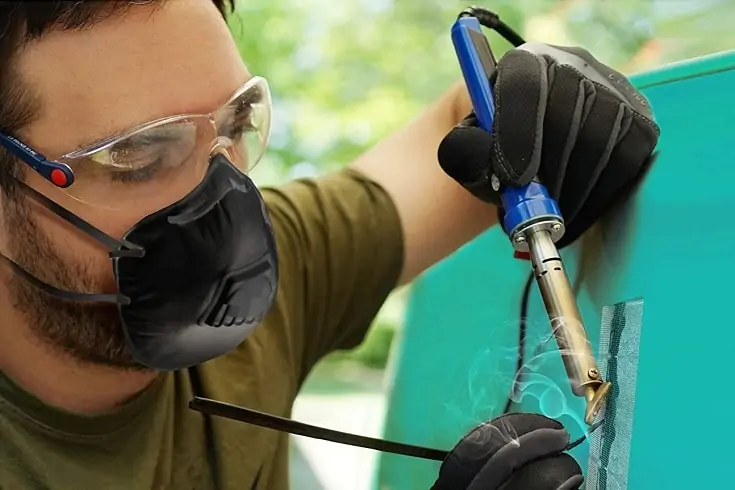
Set up your working space in a well-ventilated area: The very first step in any form of welding task is to protect yourself. Before you commence working, wear protective gear and ensure you are in a well-ventilated space. Put on long-sleeved clothing and heat resistant gloves for protection
Remove debris from the plastic by washing it with soap and warm water: Removing all impurities from the plastic eliminates any weak points during welding. After washing the plastic, you should dry them off with a clean or a lint-free cloth.
Use a liquid solvent to remove stubborn stains from the plastic. Among the best liquid solvent to use is Methyl Ethyl Ketone (MEK).
Label the plastics you have chosen correctly: If you check the plastics around you, you will notice that each of them has a distinct letter. Those letters are identifiers for the type of plastic they are.
For example, the letters PP denotes Polypropylene, PVC means Polyvinyl Chloride, and PE for Polyethylene. These letter identifiers should be the base for selecting the best rod to match the specific type of plastic. For instance, if you are joining polyethylene, you will require a polyethylene rod.
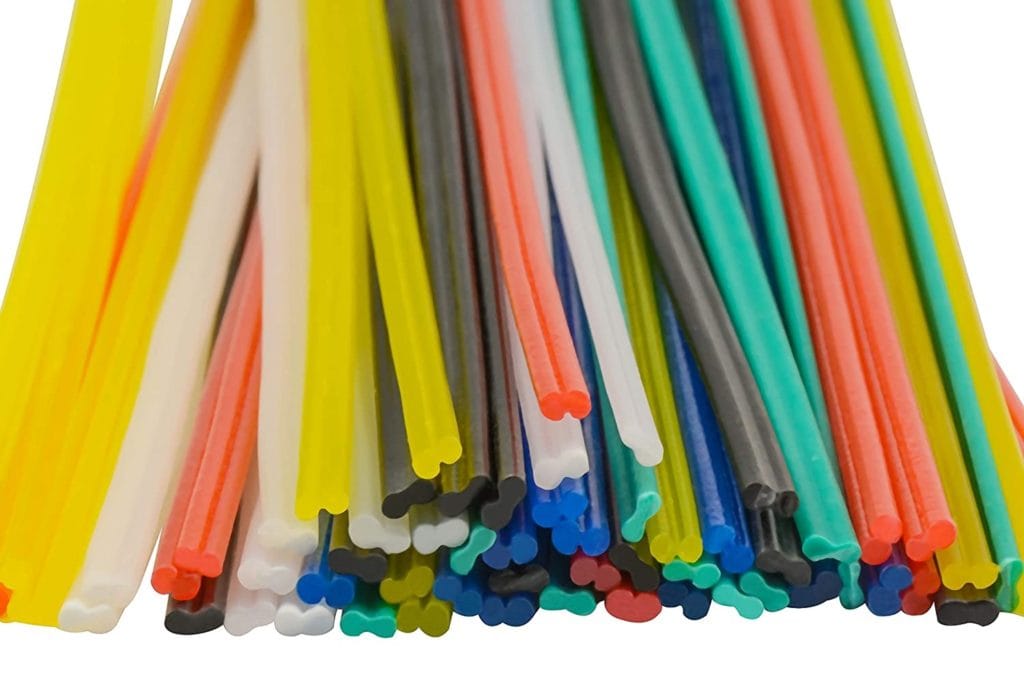
Use a welding rod test kit: If you are not sure of the plastic you have, use a welding rod test kit. These rod test kits can distinguish the different types of plastics. To conduct this test, select a rod that closely simulates the selected plastics during the testing process. Next, heat one end of the rod and attach it to a clean surface on your plastic. Try pulling it off from the rod using a pair of plastics and watch the reaction.
If the rod and plastic stick together, it means that they are made of the same material. Considering that only one rod can be compatible with the plastic, welders must carefully check the reference letters before beginning the task.
Use a piece of 80-frit sandpaper to extract any paintings from the plastic: Rub the sandpaper back and forth across the plastic’s surface. You can reduce the sanding effort by using a sanding wheel or an abrasive disc attached to the sandpaper. Paint scrapers are also useful for this exercise.
Clamp and tape the plastic pieces together to hold the joints in place: Before turning on your torch, ensure that you form the desired joint. Proceed to place the plastic pieces on a working bench while pushing them close to each other. Then, pin the pieces to the table using C-clamps. Remember to wrap a foil around the pieces to keep them pressed closely together. For the best results, refrain from covering the area to be welded.
2. Joining the Plastic
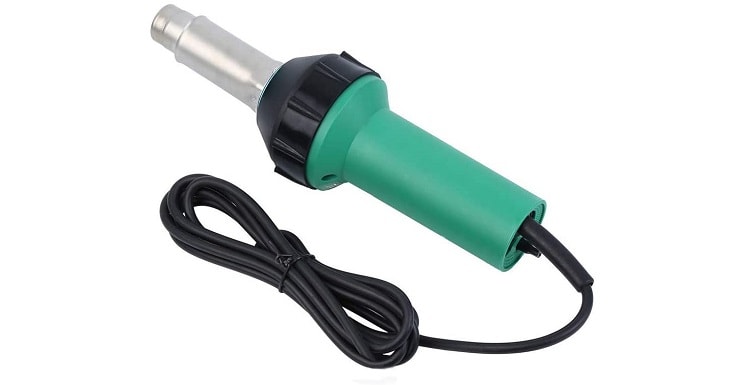
Preheat the welding gun for at least 2-3 minutes: Different plastics melt at different temperatures. As such, you should set your welding temperatures in line with the materials to be welded. The recommended temperature ranges from 200°C to 300 °C or 390°F to 570°F.
Subjecting the plastic beyond these temperatures may cause the plastics to melt ineffectively. In extreme cases, these plastics can completely burn. Keep in mind that welding plastics such as PP require you to heat the welding gun to 300C or 570F. The recommended temperature for melting PVC is 275°C or 527°F while that for PE is 265°C or 509°F.
Tack-weld the plastic ends to secure them together: Pin any loose plastics together by melting the joints’ ends. You can do this by fitting a tack-welding nozzle on the welding gun and apply some heat. Once the plastic begins to melt, join the pieces. This procedure prevents the plastic from unnecessarily moving during the welding process.
Use pliers to trim the ends of the welding rods: Hold the pliers diagonally towards the rod and snip it. Alternatively, you can use a trimming knife in place of a pair of pliers. Trimming the endpoint of a rod increases the chances of getting a smooth and steady weld.
It also prevents the formation of a big bubble of plastic once you start welding. Always allow the welding gun to cool off amid changing nozzles and inserting a new welding rod. As you begin welding again, ensure that the gun is heated up to the recommended temperature.
Insert a welding rod at the welding gun’s speed nozzle: The nozzle has been designed to hold the rod while welding. If your gun lacks a nozzle, you need to purchase one soon. After fitting the nozzle onto the plastic welding gun, place the rod onto the other opening at the top. Ensure that you place the clipped end first since you will be using this side when welding begins.
Avoid touching the tacked nozzle since it may result in severe burns as it is still hot. Using the speed nozzle, feed the rod onto the other opening during welding. You can also use pendulum welding to melt the rod if the welding is in a tight spot. Welders must understand that pendulum welding takes longer than the regular welding gun with a speed nozzle.
Gradually move the speed gun over the plastic: Ensure you begin from the top of the crack or where you desire to join the plastics. To complete the welding procedure, you should hold the gun at an angle of 45 degrees while touching the nozzle’s edge towards the plastic.
Heat the plastic until it melts while pushing the welding torch along the joint. You can fit the rod inside the joint with your other free hand at a slow pace. By so doing, the plastic will easily melt without burning. Should you notice a change in colors, consider increasing the pace of the torch.
During pendulum welding, swing the welding gun back and forth: Swing the nozzle within a distance of about 2.5cm above the joint or crack. Tilt the gun at an angle of 45- degrees while positioning the welding rod at the same angle but from the opposite side. Repeat this procedure until you finish welding.
Alternatively, you can use a basic propane torch in place of a plastic heating gun. The propane torch works best on joints that cannot be reached easily by a speed nozzle. For the best results, ensure you simultaneously control both the torch and the welding gun. To enhance the plastic’s gradual melting, you should continuously swing the torch in a fast motion.
3. Completing the Weld
Allow the plastic to cool for a minimum of 5 minutes: Before you continue working on the plastic, allow it to cool down to room temperature. One advantage of welded plastics is that they take a short time to cool. The most basic way of determining if the fused plastic has cooled off to the desired temperature is by passing it close to your body. Zero heat means it is ready for you to continue working on it.
Ensure you fix the weld before it cools completely. If the welded plastic is not smooth enough, add more welding rods. Place your weld in a safe spot, preferably on a heat resistant surface, until it cools off completely.
Sand the welded joint: For consistency, smooth out the rough ridges with 12-grit sandpaper. Sanding will ensure the plastic and joint are leveled. It also prevents scratching the plastic surrounding it. Welders can use a rotary tool attached to a sanding wheel to speed up the sanding process. Ensure that you carefully sand since plastics are tender and prone to scratching easily.

Use 180/320 grit Sandpaper to finish the plastic: A grit sandpaper will help you neaten out the weld. 180 and 320-grit sandpapers are known for their ability to produce high-quality grits. While such grit sandpapers may be mildly abrasive, welders need to be extra careful as they can still scratch the plastic.
The procedure for sanding using 180/320-grit sandpaper should be similar to that of the 120-grit sandpaper. Rub the weld until it feels smooth to touch and has a consistent look. Begin sanding the blended plastics with lower-grit sandpaper as you upscale to higher and finer ones. In doing so, you will save the higher grit-sandpaper for the finishing task. You should note that the lower-grit sandpaper is usually coarser than the higher-grit ones.

How To Weld Plastic: 5 Methods
If you are looking for the answer on how to weld plastic, there are actually several ways. These methods are distinctive based on their heating processes. They are classified under two major categories as either internal or external heating methods.
Here are the most common methods to weld plastics:
- Ultrasonic Welding: This method involves re-forming or joining thermoplastics using heat produced from high-frequency acoustic vibration. The process is completed through the conversion of high-frequency electrical energy into high-frequency mechanical motion. In conjunction with other external forces, the mechanical motion produces frictional heat at the welds’ meeting points. The heat generated triggers a molecular bond that enables the welded parts to join.
- Radio Frequency Welding: This method is similar to ultrasound welding. However, the process uses high-frequency electrical energy or radio waves instead of acoustic vibrations. Radiofrequency welding is among the widely preferred method of welding plastics. The turnaround time for this method is between 2-5 seconds.
- Hot Air Welding: Commonly referred to as gas welding, this method utilizes hot gas. The hot gas is usually generated once the air in the welding gun has been electrically heated.
- Laser Welding: Here, two parts of the welds are compressed against each other. A laser beam is then passed across the joining line to form a permanent bond, solidifying the plastic. The turnaround time for this method is 3-5 seconds.
- Vibration Welding: This procedure relies on friction to produce heat to weld. The parts to be melted or joined are rubbed together under a specific amplitude and frequency to generate friction. Continuous vibrations will eventually generate heat. The heat then melts the thermoplastics at the joint region and cause the pieces to fuse. The turnout time for this process is 1-5 seconds.
Advantages of Welding Plastics
- Preparing the working surface is easy.
- Plastic welding requires zero consumables.
- Weld plastics are light in weight.
- Plastic welds are appropriate for providing leak-tight or airtight seals.
https://www.instagram.com/p/CL69i5dgGTC/
Disadvantages of Welding Plastics
- Highly dependent on material compatibility.
- A large number of welding methods require joint designs, which may be hard to mold.
- The cost of welding is higher compared to other available methods in the market.
Tips to Consider When Buying a Plastic Welding Machine
Your work tools will always define your profession. If a good welding machine is used as desired, you will produce high-quality end products. Below are some of the tips to look out for when scouting for one.
- Quality: Ensure you check if the welding machine complies with the worldwide welding standards constructed by DVS, the German Welding Society. The DVS standards emphasize a strong, structural, and molecular welding,
- Warranty: Your welding machine should have a warranty to save you from premature breakdowns, repairs, or even the cost of buying a new one.
- Support: Do due diligence on your supplier’s support system. Look at the turnaround time from customer induction to the delivery of the machine.
FAQs
Can you Melt Plastics Together?
Yes. You can melt plastics together, provided their properties are compatible.
Why is Plastic Used so Widely?
Plastics are widely used due to their availability and low costs. They can also be molded easily to form different shapes and sizes. Whenever a plastic item cracks, unlike items made of glass, they can be easily recycled or repaired.
https://www.instagram.com/p/CLjcL8dj3qZ/
What is an Ultrasonic Welding Machine?
An ultrasound machine is used to convert Alternative Current (AC) into mechanical vibrations using piezoelectric ceramics. The turnaround time for the ultrasound welding machine is 1-2 seconds.
Is it Possible to Weld Dissimilar Plastics Together?
Plastic welding relies heavily on the types of plastics being used and the processes of welding. The bond formed when you attempt to blend two different plastics will be extremely week.
How Strong are the Welds?
Thermoplastics are known to be durable welds. The welding project and ultimate use determine the strength of the welds.
Conclusion
In general, learning how to weld plastic is incredibly innovative and has become the ideal method for the invention of limitless items. These items are an integral part of our daily life. The plastic industry has also employed a large labor force, providing income and a livelihood to millions of people.