Stick Welding For Beginners: 11 Tips & Tricks to Get You Started
Last Updated on
Stick welding, also referred to as flux shielded arc welding, is a welding method that utilizes a consumable electrode covered with a flux to create the weld. The process is done by striking an electric arc between the metal electrode and your workpiece.
An electric current passes through the metal electrode, making it melt into the workpiece and creating a weld pool. The electrode is covered in flux that melts and protects the weld from contamination by the atmosphere. The flux layer forms on the weld bead, which you will have to chip off and brush down when you complete the welding process.
Stick welding is popular with outdoor welders because it is not affected by wind and because of its simplicity and versatility, making it easy to master by beginners. This article offers simple tips and tricks for beginners to start stick welding, some common problems, and how to avoid them.
Understanding Stick Welding
Stick welding gets its name because the electrode used for welding is in the form of a stick. The process uses electricity to melt the electrode or the filler metal rod. The electrode and metal joint are melted simultaneously and fused.
The joint is then filled with filler metal to make it stronger. The flux covering the electrode melts because of heat and protects the weld pool from contamination by the atmosphere. The flux offers the same protection as the shielding gas has in TIG and MIG welding.
When stick welding, the current flow emanates from the power supply through the ground clamp and electrode holder to form a closed circle. This makes the electrode melt and joins the metal pieces.
The welding process is mainly used for welding steel, including stainless steel and iron. However, you can also use it to weld nickel, aluminum, and copper alloys.
Here are tips and tricks to help you get started successfully.
What You Need Before You Start Stick Welding
You must have all the necessary tools and equipment to succeed and have strong stick welds. Here are some of the tools and equipment you need.
Safety Equipment
When welding, you must prioritize your safety. Make sure you read and adhere to all the safety guidelines given for all the tools and equipment you use in the process.
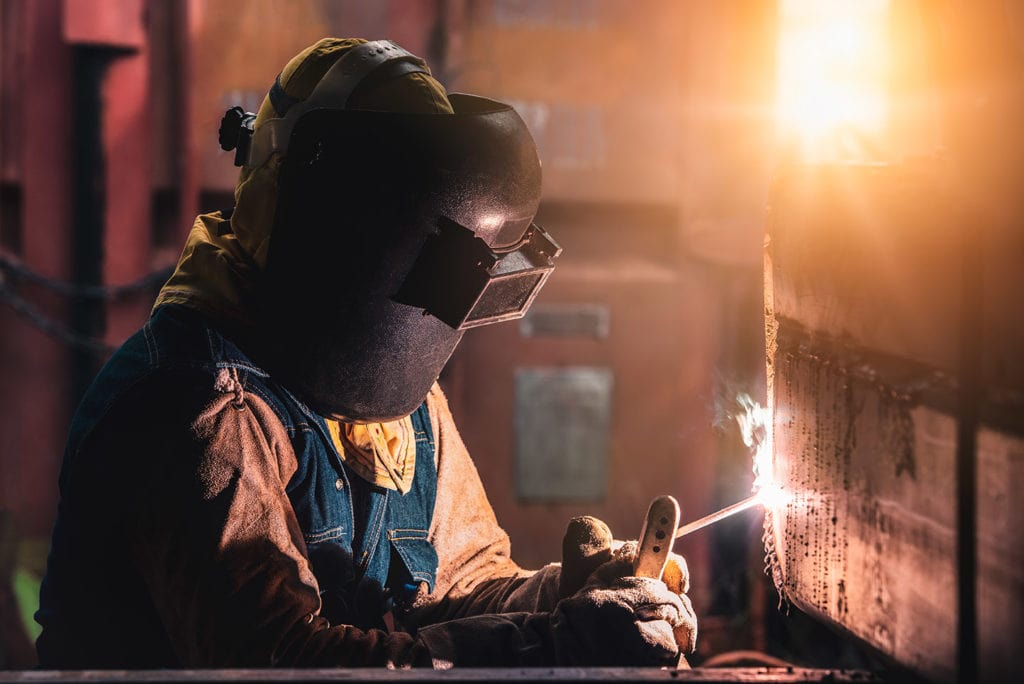
As you weld, ensure you have body protection to safeguard yourself from the ultraviolet rays, heat, and sparks from the arc. Wear safety glasses to protect your eyes, fire retardant long-sleeved clothes to protect your body, and a welding helmet for head protection.
Stick welding should only be done in a space with enough ventilation because of the fumes produced. If you are welding outdoors, you are fine, but when doing it indoors, ventilation is essential. You can also have an exhaust to get rid of the fumes emanating from the welding area.
Stick Welder
You need a high-quality stick welder to get strong welds. You can opt for a stick-only welder that is more cost-effective. There are also multipurpose stick welders you can use for other types of welding.
Ground Clamp
The ground clamp comes with a welding machine. The clamp must be plugged into the stick welder and clamped onto your workpiece.
Slag Removing Tools
Stick welding usually produces a slag over your weld. Thus, you must clean up the workpiece after the welding. You should use a hammer to chip the slag and scrub using a wire brush.
Stick Welding Electrode
Different stick electrodes are available, and you should pick the one suitable for your welding project. The most common stick electrodes are 7018, 7024, 6012, 6013, 6010, 7014, and 6011. If you are stick welding mild steel, any E70 or E60 electrode is suitable.
7018 electrodes are the most popular and produce strong welds, but 6013 is the best choice for you as a beginner. To know the electrode you require, you should understand the meaning of each of the four digits.
The first two numbers stand for the minimum tensile strength. For instance, an electrode with a 60,000 psi tensile strength will begin with 60. It should match the strength properties of the base metal.
The third number shows the positions you can use the stick electrode as you weld. A stick welder with number one indicates that you can use the stick welder in any position. Number two indicates that you can only use the electrode in a flat position.
The fourth number indicates the current used for the stick electrode and its coating.
The 11 Tips and Tricks to Get You Started On Stick Welding
1. Cleanliness Is Key
Stick welding is more flexible in terms of surface contaminants. However, you should ensure that you clean the metal to get a high-quality weld. So, it’s necessary to take a few minutes to clean your material with a grinder or brush.
With a clean metal, you can enjoy faster travel speed as you weld. With surface contaminants, you move at a slower speed giving more time for gas bubbles to boil before the formation of the slag.

2. Stick Welding Set-Up
Stick welding is a simpler process because of its easy and straightforward setup. It’s good to note that your polarity settings depend on the stick electrode you use. Thus, you need to check if it is DC+/AC/ DC-. It’s easy to get the correct settings for both amperage and polarity since the settings are indicated on your stick electrode packaging. For instance, HYPERARC 6013, the general purpose electrodes, should have a polarity of DC+ and AC. They have a current range of 90A–130A.
The 6013 are more versatile electrodes and can weld perfectly on DC+ and AC. You can choose whichever options you want. Note that most electrodes have a single recommended setting.
When it comes to amperage, every stick electrode features a range and operates without issues within the range provided. Although you may need to move faster towards the higher range, always ensure you are on the lower end.
3. Knowing If Your Amps Are Wrong
With the lower amperage, you will find that the stick electrode is stickier, making it hard to strike an arc without sticking on your metal. Without the right amps, there is not enough heat to melt your wire. You will find your arc winking in and out or stuttering, no matter how close you hold your stick electrode.
On the other hand, if the amps are too high, the weld pool gets too fluid and difficult to control. It makes your arc louder and produces excess spatter. Besides, the electrode gouges the piece without filling it in.
In terms of amperage, the best place to begin is in the mid of the recommended range. If you aren’t satisfied with the way it runs, change your amps by 5 to 10, either down or up, depending on what is happening with the arc, spatter, and pool. You can also adjust the amps depending on your position.
4. Laying Your First Stick Weld
Now that your stick welding is set up, you are ready to lay your weld. Ensure your settings are correct, get several pieces of metal, and put them down as butt joints. As a beginner, you must first practice on some scrap metal before starting working on an actual stick welding project.
5. Striking the Arc
When the entire electrode is in the holder, turn on your welder. Place the electrode’s tip onto the metal to strike the arc. Then move it across like you do when striking a match. When the arch is created, lift the stick electrode slightly.
If your arc cuts out, then it means you have lifted the stick electrode too high, so lower it. Once you light the arc, it should make a sound similar to frying bacon. If it’s too aggressive and loud, then turn the amperage down.
6. Moving the Stick Electrode
Once the arc is lit, you should now move your stick electrode across the joint to do the welding. Before moving your electrode, it should be at the correct angle, that is, between 15 to 30 percent to the vertical.
Once you place it at the correct angle, pull the electrode slowly back towards you. Don’t push it because the slag gets trapped in the weld pool and causes porosity. Make sure you keep a steady hand when welding your surface.
7. Know the Right Arc Length
Once you start the arc, the most important thing now is to maintain it. The best way to maintain arc consistency is to hold the stick electrode at a steady distance from your workpiece. Generally, you need to hold it at about 3mm off your piece to get a good arc.
If the arc gets too short, you should lower the voltage and stick the electrode to your workpiece. On the other hand, if it gets too long, your voltage increases, your puddle widens, you get excess spatter, get undercut, and your arc gets extinguished.
An undercut occurs when your weld gets extra-wide, base metal melts along the edges, and there is no filler material to fill the gap. This creates a groove on the weld’s toes.
As a beginner, it can be challenging to keep the arc tight, mainly because your stick electrode is melting away and becoming shorter as you proceed with the welding process. However, with enough practice, you get used to it.

8. Ideal Travel Angle
You need to use the backhand or drag technique as you do stick welding in horizontal, overhead, or flat positions. You can hold the stick electrode perpendicularly and then tilt the top in the travel direction by roughly five to fifteen degrees. You need to use 10 to 15 degrees of pull or drag to get the best results.
9. Dragging Your Weld
Always drag or pull your stick welds because if you try to push, you trap the protective slag inside the weld pool. This leads to contamination of the weld.
However, you can drag the electrode if you run a vertical up weld. You should only push your stick weld when welding up a joint.
10. Visibility
Like with any other type of welding, you need to see what you are doing. So, as you stick weld, ensure you are in a comfortable position to see all that is happening.
Also, keep your helmet and face away from the welding fumes. They reduce visibility and are also harmful to your health when inhaled.
https://www.instagram.com/p/Cg9vX0JrGFV/
11. Avoid Wetness
Electrodes contain moisture, but excess moisture is not good. This is especially true if you use a low hydrogen electrode. If you have a rough, erratic, or wandering electrode, chances are high that it’s not dry.
If you have a wet electrode, you flux chips and move to the weld pool, causing weld defects. To prevent wetness, you should store your electrodes sealed in a dry place.
You can also store them in an electrode oven. The oven usually re-bakes the flux coating on your electrode, making any moisture evaporate, leaving them ready for welding.
Common Stick Welding Problems and Solutions
Understanding the common stick welding issues and how to resolve them helps avoid unnecessary downtime. This is more important because the method is slower than other wire methods.
Here are some of the common problems and their solutions.
1. Stick Weld Spatter
Stick weld spatter is caused by welding a dirty workpiece or an arc length that is too long. Too long arc length causes the formation of a ball on your electrode’s end. Spatter occurs when the ball detaches and then drops into the puddle.
If you don’t clean the base material, weld contamination occurs, leading to spatter. Spatter also arises if you use too high welding current, using damaged or unclean electrodes.
To deal with frequent spatter, adjust your welding current and have the correct arc length. Make sure you clean the weld material before starting the process. Also, follow the filler metal recommendations on storage and how to prevent moisture.
https://www.instagram.com/p/Cg_3jcog16R/
2. Porosity
Porosity is mainly caused by a dirty surface. Some impurities that can contaminate your weld include moisture, grease, oil, mill scale, and rust. Thus, before stick welding, make sure you clean the base material and store the electrodes correctly.
This problem can also arise if you have too short or long arc lengths. So, always have the correct arc length. With an excessive long arc, you don’t allow the shielding atmosphere to protect the weld. The right arc length depends on your electrode diameter.
Besides, too high welding current makes the weld pool freeze before the gas escapes, leading to porosity. The problem can also arise if you use a travel speed because you outrun your gas coverage. So, always adjust the speed accordingly.
3. Poor Penetration or Lack of Fusion
Poor penetration and fusion result when you move at a very fast travel speed if you use an extra-large electrode, wrong electrode angle, or use the wrong electrode type. The issues can also occur if you set too low welding current that cannot provide the proper amperage to penetrate through the joint.
Both issues can occur with poorly designed joints or faulty joint preparation. You should minimize the travel speed and enhance the welding current to prevent the problem. You should also ensure that the weld design lets electrode accessibility to all surfaces in your joint or use an electrode with a smaller diameter.
https://www.instagram.com/p/Cg5CVfzuab4/
4. Undercut
Undercut occurs when the joint is not filled in properly, leading to an eroded section or a groove. Undercut in stick welding is mainly caused by too high current or fast travel speed. Too fast travel speed means you stay in a position for a short time, thus not filling the joint effectively.
To avoid the problem, you should stop at each side of the weld bead when applying the weaving technique. Ensure you minimize travel speed; use the right electrode angles and the correct welding current for the welding position and electrode size.
5. Over Welding or Overlapping
Overlapping happens when your molten weld metal moves over the base material surface and then cools without fusing. The issue results from slow travel speed and remaining too long in the puddle, leading to excess weld metal in the joint.
The problem can also be caused by using the wrong electrode angle or using an extra-large electrode. Prevent this problem by increasing the travel speed or using the correct work angle as per the recommendations by your metal filler company. You can also avoid excess molten metal from getting into your joint by using a small electrode.
6. Arc Blow
Magnetic arc blow happens if there is an unbalanced magnetic field as you weld. It can also occur if there is excessive magnetism in the fixture or the part. Arc blow can happen when you weld away or towards the ground clamp.
When you move closer to the ground, the arc wanders, leading to a backward arc blow. Forward arc blow results when there is an unbalanced magnetic field as you weld away from the ground.
To avoid this problem, alter your workpiece ground connection location. This also helps minimize the arc length, welding current and use an alternating current.
https://www.instagram.com/p/9Y_kO0SZIL/
7. Double Striking the Welding Arc
As a beginner, you may face problems with your stick electrode sticking to your working piece. So, as you strike the arc, strike the piece, and at the same time, lift the electrode. Some electrodes are easier to strike compared to others.
For instance, E7018 electrodes stick more compared to other types. Other deeper penetrating electrodes like E6013 and E6010 do not stick since they feature more drive to their arc.
When using E7018 electrodes, you need to take care and store them in electrode ovens to avoid moisture pickup. If you allow them to absorb moisture, the weld will have more hydrogen, leading to cracking.
Final Thoughts
Stick welding is a simple process, so mastering how to do it successfully should not be an issue. You should start by having the required tools and equipment and the know-how to use them effectively.
Understand the tricks such as how to move the stick electrode, clean the workpiece, strike the arc, travel speed, and correct arc length to apply to get strong welds.
It’s also important to know the common problems such as porosity, undercut, spatter, arc blow, or overlapping and the best ways to avoid them to have a successful welding process.
Featured Image Credit: Engineer studio, Shutterstock