How to Change Battery in a Welding Helmet - 9 Easy Steps
Last Updated on
While not all welding helmets have batteries, many newer welding helmets do. Most newer models have an auto-darkening feature. This prevents you from needing to take the helmet off due to changing light conditions, increasing safety. However, this feature does require batteries, so you will need to change them from time to time.
Luckily, changing the battery in a welding helmet is not particularly complicated. It is relatively easy once you know the proper steps. We’ll take a look at all the steps you need to know and clear up some common misconceptions involving batteries and welding helmets.
All helmets have their own directions for changing the batteries. The steps can vary somewhat, but here is the standard procedure for changing welding helmet batteries:
9 Steps to Changing Batteries in a Welding Helmet
1. Check the Current Batteries
Before you begin changing the batteries in your helmet, you need to ensure that the batteries need to be changed in the first place. While dead batteries are a common reason these helmets stop working, other things can go wrong.
There are a few ways to check the batteries before you begin the whole process of changing them. Performing these preliminary steps first can prevent you from going through the whole changing process for no reason. The way you can do this depends on your particular helmet model.
- Check Alert. Some helmets have a light signal that lets you know when you need to change the battery. If this is going off, your battery likely needs changed. However, if it isn’t, and your model comes with this feature, your helmet’s dysfunction may be another reason.
- Test your helmet. Assuming your helmet has an auto-darkening feature, try welding at different intensities. If your helmet doesn’t seem to be adjusting correctly, your batteries may be running out of juice.
- Take the helmet outside. An easy way to test the auto-darkening feature is to put your helmet on outside. If the helmet darkens appropriately, then you probably aren’t having a problem with your batteries. However, if there is little difference between inside and outside, you need to get your batteries tested.
2. Get Everything Your Need
Before you begin, you should go ahead and gather all your materials. This will make the rest of the steps go by much faster and prevent you from accidentally forgetting something. When changing the batteries, here are some common materials you’ll likely need.
- Strong glue
- Screwdriver
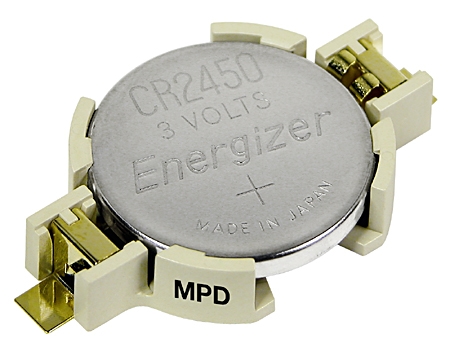
- Four batteries – the exact type will vary from helmet to helmet
- Soldering iron
- Dremel tool
- Cell holders (3VDC are a standard option)
3. Figure Out Where the Batteries Are
Once you have everything gathered, it is time to figure out where the batteries are. In some user manuals, the location of the battery is listed. However, not everyone has their user manual, and not every manual includes this information.
Batteries are often on the front of the casing. While looking at the front casing part close to the lens, you may notice a solar cell. This cell doesn’t create any power in many cases. However, it is one of the units that detect light differences and tells the helmet how dark to get. The battery is usually located somewhere around this solar cell.
After you locate this area, you will need to dig around the area using your Dremel tool.
4. Cut Out the Plastic Part
After you locate exactly where the battery is, you will need to cut the area surrounding it. This area is likely relatively small – about the size of a postage stamp. It may look different from the surrounding plastic. You will need to cut this plastic piece off, as the battery is underneath it.
Once you remove the plastic part covering the battery, you should take a picture of the batteries and their set up. This will help you figure out how to install the new batteries later. You can’t forget which way to install the batteries if you took a picture of the original.
5. Take the Battery Out
This is probably the most challenging step that requires the most accuracy. There should be several tabs that are holding the batteries in place. You should be able to loosen the tabs using the tip of a screwdriver or with precision nippers – whichever you have handy. Once the prongs have been bent, you should be able to remove the batteries carefully.
As these are essential parts, you do not want the tongs to break. You need to be very gentle, as they break very easily. Muscle isn’t necessarily the right option here.
6. Put in a New Battery
Once the old batteries have been removed, you can replace them with a new battery. Be sure to connect the right polarities to the correct end of the battery. If you took a picture earlier, you should have a good idea of which end goes where?
You will need to solder the new leads with the new battery. Now, the batteries are replaced, but you still have a bit of work left to do.
7. Do It All Again
Often, there is another battery located somewhere on the helmet. Sometimes, it is near the place as the first battery. Sometimes it is not. Either way, you’ll need to find it and follow the same previous steps to change it out.
Your helmet may or may not have a second battery. You can figure it out by reading the instruction manual. If you don’t have a manual or it doesn’t say, you can figure out whether you have a second battery by testing the helmet, which we will discuss shortly.
8. Put the Helmet Back Together
You’ve likely done some real damage to your helmet at this point. Now, you need to fix it all back together. You can use your adhesive of choice for this part. Many people use superglue, but an epoxy is also an option if you have the time and patience for the curing process. It is a bit more heat-resistant, making it more suitable for these situations.
9. Test the Helmet
Not that you’ve changed the batteries, you need to test your helmet. You can do this using many of the ways we discussed earlier. Taking it out in the sun is the easiest way to do this, and it has the benefit of being very safe. While you can just put the helmet on and start using it, you don’t want to be in the middle of welding and figure out that your helmet isn’t darkening correctly.
FAQ
Now that we’ve gone over the steps necessary to change the batteries in your welding helmet, let’s look at some of the most common questions associated with this process.

Do all auto-darkening welding helmets have batteries?
Yes. However, the type of battery will differ. Some are powered by internal non-replaceable lithium batteries that have a solar assist. Replaceable batteries power others. We recommend replaceable models over those that are not replaceable, as it increases your helmet’s overall lifespan.
Why is my auto-darkening welding helmet not working?
There are a few reasons why your auto-darkening helmet may not be working. One of the most common and easiest-to-fix reasons is the battery not working. If you need to switch your battery, this is the perfect article for you!
Of course, there are some other reasons as well. One of the more common reasons is the sensitivity being at the wrong level, which can usually be adjusted on the helmet. Sometimes, the helmet may not be tight enough, which can cause difficulties as well. Most problems common in welding helmets can be fixed by making a few adjustments on your end.
How do I know if my auto-darkening helmet is working?
The easiest way to tell if your helmet is working is to put it on while inside and walk outside. The outside should (hopefully) be brighter than the inside. Therefore, the helmet should darken when you walk outside. If it doesn’t, then your helmet isn’t working. The odds are that it needs new batteries, precisely what we help you do in this article.
Why do welding helmets need batteries?
Not all welding helmets need batteries. Many don’t need batteries at all. However, if they have an auto-darkening feature, then they likely need batteries. This is to power the auto-darkening, which protects your eyes and eliminates the need for you to pull the helmet up to check the weld continuously. Instead, the helmet lightens and darkens as the light level in front of you changes. This requires power, which is why some helmets need batteries.