5 DIY Squat Rack Welding Plans To Assemble Yourself (With Pictures)
Last Updated on
Do you need a squat rack for your home gym but don’t have the cash to spend on an expensive commercial model? If yes, consider assembling your own.
Squatting is the best exercise, whether you’re a bodybuilder or just looking to lose some weight. If you want to get the most out of your squats, you need an excellent squat rack. And better yet, you don’t need to buy it- you can make one yourself. It’s not as challenging as you might think, and you will save quite some money.
In this article, we’ll discuss six DIY squat rack welding plans that are easy to assemble! Keep reading!
The 5 DIY Squat Rack Welding Plans
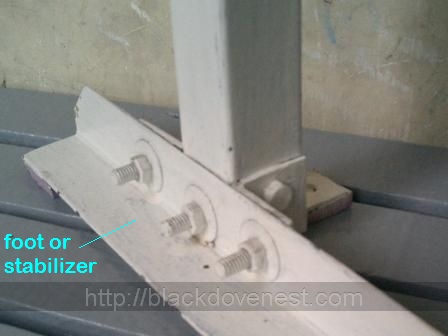
1. Homemade Adjustable Safety Squat Rack by black dove nest
| Materials Needed: | Steel square tube, washers, steel pipe, machine bolts, an angle bar, a rubber garden hose, construction adhesive, and duct tape. |
| Tools Needed: | Vise grips, drill bit, hack saw, pliers, power drill, and heavy-duty scissors. |
| Difficulty Level: | Easy |
Consider making a homemade adjustable safety squat rack if you have a garage and some basic welding skills. This squat rack comes with several features that make it easy to use and safer than most other homemade squat racks.
The project is perfect for anyone with limited space and money to spend on an excellent squat rack. It’s also an excellent option if you want a fully customizable rack that you can adjust to any height or angle.
The best thing about this design is that it’s made from high-quality steel. It also has several holes drilled into it. This way, you can place your bar in any position you want. It is perfect for doing squats or pull-ups. Don’t worry about keeping track of where the bar should go each time you change your stance or grip on it.
2. Peg Squat Rack by crafts man space

| Materials Needed: | Steel tubing, metal clamps, bolts, and nuts. |
| Tools Needed: | A welder, welding rod, screwdriver, and a wire feeder. |
| Difficulty Level: | Easy |
If you’re looking for a power rack that you can assemble in your garage, the Peg Squat Rack is a perfect choice. It is made from steel and it comes with all the necessary hardware for assembly.
The plan uses metal pegs attached to the barbell. The pegs are placed on top of the plates. Then, they’re lifted off the ground using a barbell.
You can use this squat rack with any barbell, but it works well with fat bars because they have extra grip space on the top and bottom.
This squat rack also works well if you want to bench press inside the rack. It has more than enough room for both lifts at once!
3. NEW Squat Power Rack by Youtube
| Materials Needed: | Steel tubing and beams, bar holders, and J-hooks. |
| Tools Needed: | A welding machine, welding wire (usually MIG), a cutting torch, a metal grinder, and an angle grinder. |
| Difficulty Level: | Easy |
You can assemble this DIY squat rack through welding. The rack has many holes to adjust its height. So, you can use it for different purposes- from squats to bench presses and everything in between.
The steel tubing is made of high quality and rust-resistant materials, and the barbells are made of high-grade steel.
The power rack comes with a complete set of tools. So, you don’t need to buy anything else to assemble or weld it. It can support up to 500 pounds.
It has a compact design that doesn’t take up much space.
4. Retractable Power Rack by fringe sport
| Materials Needed: | High-grade steel tubing, base plates, J-hooks, nuts, and bolts. |
| Tools Needed: | A Portable power supply, a set of Allen wrenches, a torque wrench, and a screwdriver. |
| Difficulty Level: | Advanced |
You have seen plenty of DIY squat racks, but a retractable power rack takes the cake for being both practical and functional. This power rack features a pull-up, dip, and a chin-up bar. They help you get extra upper body training while you’re at it.
It also features two spotter arms that keep the weight balanced on the bar during squats, bench presses, and deadlifts.
The entire rack is made from steel tubing. It has an adjustable height, making it suitable for all users. This design needs a lot of welding and fabrication, but it’s an excellent project if you have access to a welder and the necessary tools. You can put it together for under $500.
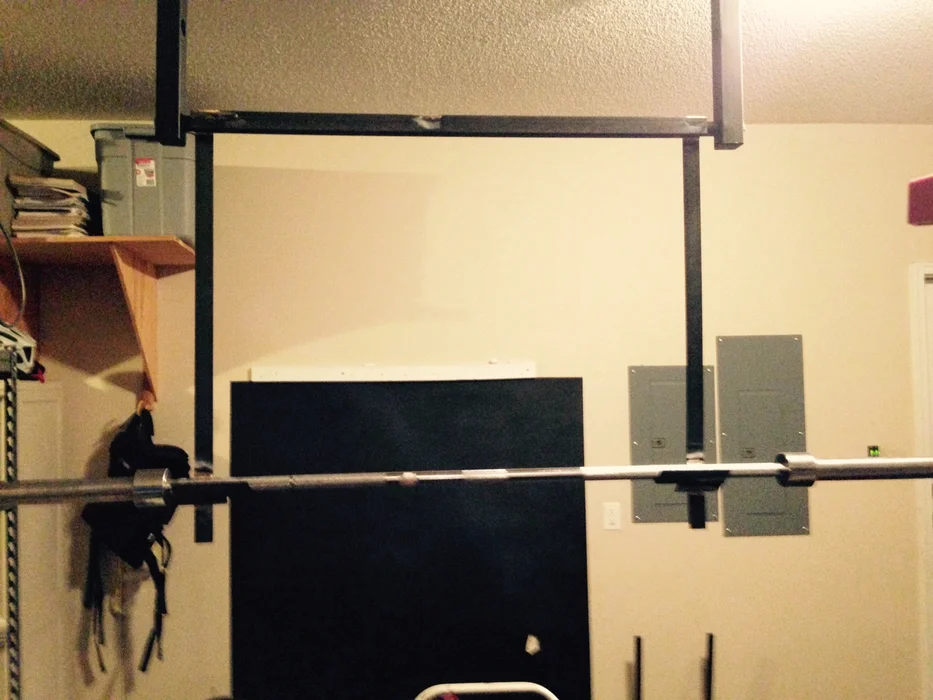
5. Squat Rack with Pull-Up Bar by instructables
| Materials Needed: | Bar hooks, vertical risers, pull-up bar, washers, nuts, and bolts. |
| Tools Needed: | A screwdriver, power drill, a wrench, and a stud finder. |
| Difficulty Level: | Beginner |
This Squat Rack with Pull-Up Bar is one of the most basic squat racks you can buy, but it’s still functional and excellent for beginners. The rack has a pull-up bar and supports up to 350 pounds. It is ideal for people who want to get into powerlifting or bodybuilding.
If you want to make it more durable and sturdy, you can use galvanized pipes instead of regular ones. It works well when doing pull-ups and squats.
The rack has holes in the base. So, you can also bolt it down to concrete or wooden floors for extra stability. It’s an excellent choice if you’re looking for a basic squat rack that will fit any home gym or garage gym space.
All the materials needed for this project are available at any local hardware store or home improvement store. So, there won’t be any problems finding what you need.
Benefits of Welded DIY Squat Racks
A DIY squat rack might be right up your alley if you’re a DIYer and love building things. They are cheaper and also give you more control over the final product.
Squat racks are essential in any weight lifting home gym. Most of these squat racks may be expensive. So, building your own is an excellent option to save money and time.
Here are several benefits of DIY squat racks.
It’s cheaper than buying one fully assembled
You can build your squat rack for less than $100. It makes it much more affordable than most commercially available models. But if you want something larger or more high-tech, it will cost more money.
They’re easy to assemble
You don’t need any special skills or tools. If you can use a welding machine, you have all the skills to build your squat rack. You’ll have something sturdy enough for even the heaviest squats in just a few hours.
They’re safe
DIY squat racks may not look as professional as commercial ones, but they offer more safety features than their commercial counterparts.
Most homemade squat racks provide safety bars for added support when doing squats or bench presses. These safety bars keep users from losing balance and falling off the rack during use.
You can customize it
You can build your squat rack to fit the exact dimensions of your room. This way, it will look good and not take up too much space. You won’t have to buy an expensive squat rack that takes up half the room.
You can also customize the height and width of your rack to suit your needs, whether you’re tall or short or want to perform different exercises.
They’re sturdy
DIY squat racks last for years without any problems because they’re made by hand using high-quality materials. They are built to hold up to the demands of heavyweights and intense workouts.
So, you won’t have to worry about them falling apart on you or bending under pressure from an intense workout session.

Conclusion
Assembling an excellent squat rack from scratch isn’t an easy task. There are many moving parts and pieces to keep track of. But with the plans in this article, you can build a complete rack for yourself. You will only need a welding machine and some metal rods.
With a little determination and elbow grease, you can weld an affordable, functional, free-standing squat rack. It’s all about what you put into the project. Invest the time and effort needed to succeed, and there’s no reason you can’t have a phenomenal squat rack for years to come.
Featured Image Credit: George Pagan III, Unsplash