How to Make Welding Clamps at Home - Easy Step-by-Step Guide
Last Updated on
Welding clamps are essential when you want to weld items at home or in the workshop. But, did you know that you don’t have to go to the hardware store to get one? You can grab the required items and make one at home.
The excellent news is welding clamps are just the tools you need to hold two metal pieces together before using a welding torch. Using the right clamp, you keep the metals steady as you use heat to complete the process. Besides, it’s the only way you can ensure the two items are correctly aligned.
For any beginner in welding, it’s best to understand what the tool is and how to make one at home. After that, you can start welding different metal pieces together for various projects. But wait, there’s more.
Still, it’s crucial to delve deeper into welding clamps and understand their role in welding. After that, you can follow a step-by-step guide to help you make some at home.
Different Kinds of Welding Clamps
When you weld metal, you need to hold the metal pieces or sheets steady. If not held steady, you can end up with crooked bonds or worse still get burnt by the welding torch.
To avoid this, every welder requires a clamp to hold the pieces steady while remaining safe. Welding clamps are a crucial part of any welding project, no matter how small it is. It’s best to use them rather than risk not having them in the first place.
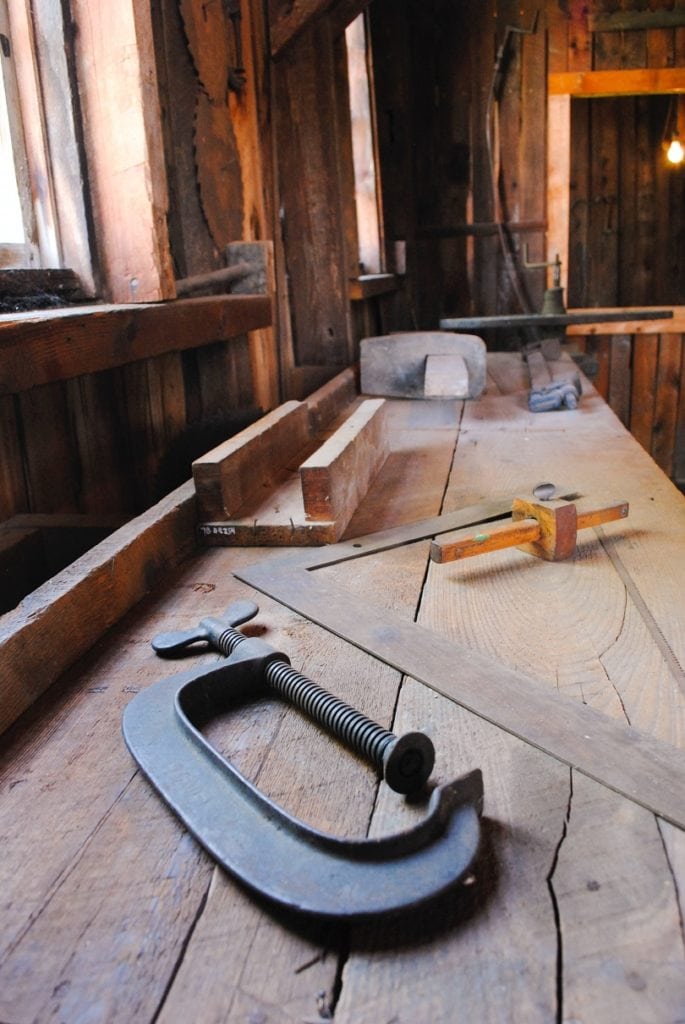
1. C/G Welding Clamps
Every welder knows the C/G clamp quite well. Its versatile design makes it suitable for multiple projects that require extreme stability to complete. Additionally, it helps you remain safe as you weld the two metals together.
Still, it’s worth noting that it can be a slow tool to use. While it holds the material well, it’s not that easy to release it. All in all, you can find different variations of the C/G welding clamp that come in handy, and it’s easy to make one at home.
2. Two-Axis Clamp
The ideal items to hold with this welding clamp are rods or tubes. The good news is you can fit together two tubes or rods that have varying thicknesses. All you need to do is fix the welding clamps on a welding table.
3. Locking Clamps
At times you want to weld together small metals that are harder to grasp with other welding clamps. It’s where locking clamps come in handy, and these are also ideal for clamping thin aluminum sheets, for example.
4. Vice Grips
When working on a car and you need to hold an irregular item in place, you need good vice grips to get the job done. You can also use them when welding miniature materials.
5. Spring Clamps
In terms of ease of use and affordability, you can never go wrong with spring clamps. You only need to squeeze them open and grip the items that need welding, keeping them in place.
6. QAC (Quick Action Clamps)
The QAC is taking over the welding world as the newest kind of welding clamps you can use. The reason for their rising popularity is the fact that you can use them without any other object. Also, they only require one hand to tighten the grip.
Other kinds also include dimide clamp, F clamp, pipe clamp, parallel clamp, Kant-Twist clamp, and sash clamp.
Step by Step Tutorial for Making a C/G Clamp at Home
Every project has a preparation phase and the same goes for making a C/G clamp. Since you’ve already decided on the kind you need, the next chapter gathers the required materials to make a quality welding clamp.
Factors to Consider When Making a Welding Clamp
How can you determine which is a good clamp to use in a project?
Projects are the critical determinant of an ideal welding clamp make. But how can you note the right kind of clamp to make or use? What are the factors to consider?
1. Cost of Material
The best welding clamps use steel for the main parts, but it’s not cheap to get your hands on. Another option would be iron, but the main deterrent is the fact that it quickly corrodes. So how much are you willing to spend to make a quality welding clamp?
2. Extra Padding
What materials will you be welding, and are they prone to scratching and abrasions? As you contemplate the materials you need to make a suitable clamp, consider if you need padding or not. If you do, then you might need to spend extra.
3. Type of Project
Is the purpose of the clamp to hold small materials together or larger ones? The thickness of the project metals or materials is essential to consider before making a clamp. You want to get it right from the start and not have to redo the whole piece once complete because it won’t fit properly.
4. Number of Clamps
How many clamps do you need to complete the project? If you need multiple clamps, you need more materials. The good news is there are plenty of places you can search for affordable scrap metal to use for making welding clamps at home.
Understanding these factors gets you closer to making your first welding clamp to use on a project. But first, how can you use the welding clamps you make safely? What are some safety tips to note?
Also, as you decide on which welding clamps to make for your project, it’s good to know how much one costs at the hardware.
Essential Components of a C/G Clamp to Make at Home
- Frame
- Rod with Screw lining
- Collar
- Handle
- Movable Jaw
While you won’t need to make all these parts for a homemade C/G welding clamp, the essential components remain the same.
- A thick piece of iron or steel measuring 10 inches in length and 6 inches in width
- (1) ⅝ threaded rod
- (3) ⅝threaded rod nuts
- 5-inch rod
- Grinder
- Metal cutting torch
- Welding torch
Process of Making the Clamp
After gathering the necessary materials and tools, you need to select a work station. Choose one that has few or no items on top to have ample space.
- Start by getting the metal you choose and drawing out the C/G clamp. Ensure you use chalk to make the drawing visible as possible as you cut out the welding clamp.
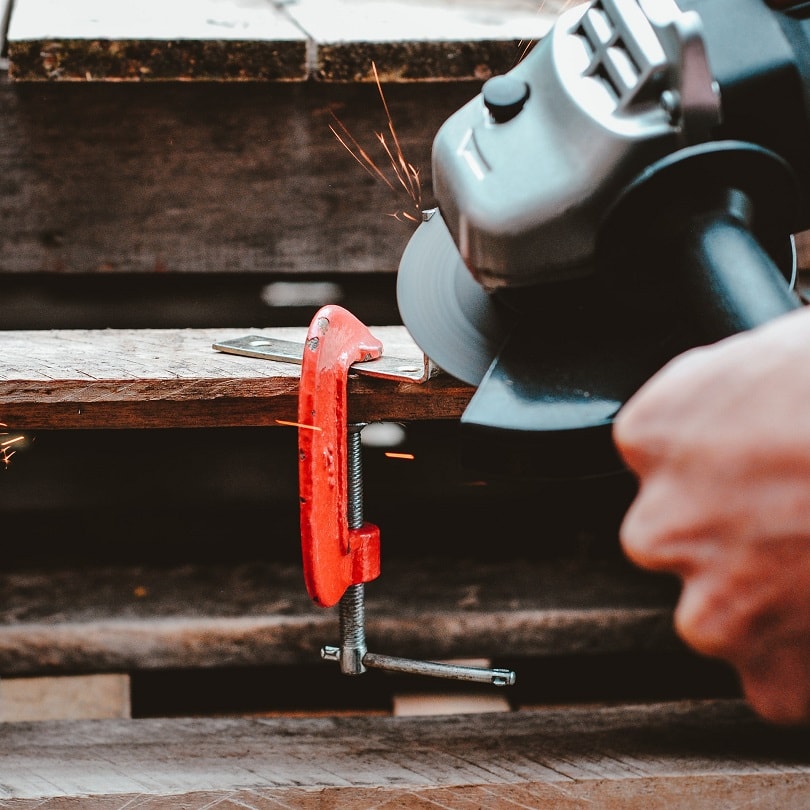
- Next is using the metal cutting torch to cut out the drawing of the clamp. For safety, put on safety glasses, welding shields and gloves. A cutting torch is a better option since it gives you a smoother C for the welding clamp.
- Once the cutting is complete, turn on the grinder and grind down all the rough edges on your C. Follow this by making the clamp’s tightening part. It would be best if you fetched the rod and nuts.
- Screw the nuts onto the rod and ensure all flat sides are in alignment. But don’t tighten the nuts since this can make it hard to tighten and loosen the welding clamp.
- Pick one side of the flat surfaces and use a welding torch to weld them into the C’s far end. You’ll need to have a welding clamp on-site to grip the rod, nuts, and metal together while welding.
- Finish making your homemade welding rod by welding the metal rod to make the handle. Again, you need to grip both the rod and the welded one in place before you weld for better results. And now, you have an excellent C/G welding clamp to use at home on other projects.
Checklist for a Good Homemade Clamp
- Quality
While it’s possible to make a good C/G clamp at home, you need to consider the quality you want. It’s what determines the right material to use. For example, if you want a heavy welding clamp, use a heavier metal for the C part.
- Size
If you’re new to making welding clamps, start making a small one before trying out bigger ones. It helps you to master the technique necessary to produce quality clamps at home.
- Other Options
While making the C/G clamp, you need to hold different parts together while welding. In case you don’t have a clamp at hand, you can opt to use a pair of quality pliers for the job. It helps keep the items stable and you safe as you use the welding torch.
- Clamp without Clamps
Other options apart from pliers are available when you need to clamp without using any clamps. For example, you can finally make use of that weight lying around in the workshop. All you need to note is you must balance the weight on the items you want to weld perfectly. If not, the weld won’t be effective.
Additionally, you can use elastic bands. Elastic bands are easy to use when you want to tie items together. Tie the band around the different parts and weld. You can remove them after finishing.
Also, you can opt to use wedging blocks of wood that are even on all sides. The best wedges need screwing onto another piece of wood. Ensure the two are aligned before you screw them. It creates an ideal clamp without having a clamp.
And finally, you can opt to use quality tape. Opt for the tape that sticks well to metal and weld. After completing the process, you can remove the tape and check the work.
Safety Tips to Consider when Using Welding Clamps
As stated before, you must use a welding clamp for your safety when welding. But how can you ensure you use it well to avoid any incidents?
- Two Clamps are Better
While one clamp is ideal for small projects, larger ones require two or three as a safety measure. These guarantee you stability as you weld the items together because you avoid any movement.
- Never Leave the Welding Clamp in Place After Welding
Once you finish welding, remove the clamps soon after. Just ensure you check the weld is proper before you do.
- Tight Grip Only
You risk snapping the welding clamps or damaging the material that needs welding when you over-tighten the welding clamps. Only tighten, but don’t over-do it.
- Cushion the Metal
Does the welding clamp have some form of padding to prevent scratching or abrasions on the metals? If not, you need to use something like wood to cushion them and to avoid damage.
- Clean the Clamps
After welding, remember to clean them and store them in a cool, dry place.
Conclusion
Welding clamps are a crucial part of every welder’s projects if you want to guarantee quality work. Also, you need them to ensure you remain safe while using a welding torch. While there are many kinds of welding clamps, the most basic with numerous variations is the C/G clamp. Making it at home is easy and fast if you have the right materials, tools, and know-how.
Featured image credit: PakulinSergei, Shutterstock