How to Replace Rocker Panels Without Welding - A Complete Guide
Last Updated on
On numerous late-body pickup trucks, the rocker panels are a real Achilles heel. Their position beneath your doors implies that they’re exposed and likely to be affected by damage and corrosion.
Once the rockers start to rust, it won’t stop – lest you do something about it. Replacing rocker panels cannot be done by a novice. However, if you have the right replacement rocker panels and the correct tools, you can do it. Connecting new rocker panels will prolong the lifespan of your pickup truck and keep it on the road for a long time.
As soon as damage and corrosion occur, it’s good to tackle it instantly. It stops rust from gaining a foothold and leading to considerable damage. It’s even crucial for rocker panels as any panel damage allows more water and grime to seep through and accelerate corrosion.
Why Does It Happen?
Damage to rocker panels can occur due to distinct reasons. They include damage to paint by gravel and rocks, collision impacts or accidents in the parking lot, off-road use, or the usual corrosion caused by everyday use. Irrespective of the reason, ensure you fix the damage.
Your rockers serve as a shield for the more precarious sills and frame rails of your pickup truck. Once they’re corroded, your sills are completely predisposed to the impact of gravel, off-road driving, or rusting themselves. Fixing rusty sills is too much undertaking than replacing rockers.
Follow similar steps like the experts, and utilize the same high-quality materials and tools. An incomplete repair job won’t last long and may begin corroding again fast and need a major repair later.
We’ve put together a guide on how to replace rocker panels without welding to make your truck last longer and drive it on and off-road for years. But first, let’s look at the distinct types of rocker panels. Read on!
Types of Replacement Rocker Panels
There are two distinct replacement rocker panel types: slip-on and welded. The panel type you select relies on the condition of your current rocker panels.
Welded Rocker Panels
If rockers are severely damaged by impact or corrosion and aren’t in their initial form, chopping off the whole panel and replacing them using full rockers is the best option. In this procedure, welding and removing the door of your truck is recommended.
Slip-On Rocker Panels
If you have rusted rockers and there’s no other disfiguration or damage, particularly along the upper and bottom edges, slip-on rocker panels are the best bet.
They don’t need to be welded because they’ll fit above the remaining portion of your existing rocker and can be secured using rivets, panel glue, or any other fasteners. Usually, slip-on replacements don’t require much cutting work beforehand and are generally faster to connect.
In this article, we shall look at all the steps involved in replacing slip-on panels. Let’s jump right in!
How to Replace Slip-On Rocker Panels
With slip-on replacement rocker panels, the steps involved are similar to those of the welded type. However, they somewhat vary in the preparation work and mounting method.
“Slip-on” doesn’t imply that you slide the panels above your rusty, damaged ancient ones, and you’re through. You have to do more work to get rid of the rusted parts and then attach the new panels into position.
When it comes to slip-on, you can mount your new panel using adhesive or fasteners instead of welding them. With this option, you don’t have to remove the doors of your truck.

Tools Required for a Slip-On Rocker Panel Replacement
When it comes to this rocker panel replacement type, you’ll still require tools similar to those needed in weld-in rocker panels. It’s because you’ll be peeling off the paint from the affected area, discarding the damaged and rusty parts of the panels.
- A wire brush
- A pneumatic/electric drill
- Angle grinder
- A hammer or a pry bar
- Rivets/fasteners/glue
- Anti-rust agents
These are the primary tools that you need to restore your truck. You also require a pair of dual palm leather gloves or any other robust work gloves to shield your hands. Remember, you can chop into the rocker panels without compromising on your truck’s structural integrity.
However, you have to be cautious not to cut into the frame or sills. Before cutting, raise your truck; support it beneath at several locations. To keep it from bending, add a brace at the doorframe.
How to Mount Slip-On Rocker Panels
If you’ve decided to take the slip-on route, we’ve all the information you may need. Slip-on Rocker panel attachment can be done on various pickup trucks comprising Chevrolet, GMC, Ford, Jeep, and Dodge. These are the trucks that endure hard use and are likely to suffer damage and rust.
Ensure that you give your new truck a new life and avert further, more distressing frame rust and door sill by replacing your rocker panels using slip-on replacements by adhering to the below steps.
1. Detach the Old Metal
Use an angle grinder to cut the rusted metal off your aged rocker panels. To accomplish this step, you can use up to five blades. If you get that the rocker panel and the door of your truck bows out, the same way like many others do, you’ll need to cut off a large part of the panel for the new slip-on to fit into position.
You should also ensure that you leave sufficient to affix the new panel. Therefore, if you don’t cut more than half of the seam, you’ll have sufficient room and, at the same time, ensure that the new panel fits into the natural bow of the side of the truck.
2. Remove Rust and Lingering Chips
Use a hammer and a pry bar to get rid of any rusty metal from beneath the doorways. The remaining rust is a primary location for rust to begin building up after you’re through with the job.
You cannot weld well on rusted metal and get the clean, potent weld you need between the replacement panel and the existing one.
3. Sand Away or Rub Remaining Rust
After removing most of the rust and damage, ensure that you clean off the remaining rust and then paint the grinder using 50-grit discs.
Attempt to reposition your new slip-on rocker panels often to make sure they fit well and there are no bent edges or burrs that stop the rocker panel from sitting against the remains of the new one.
4. Cover Using a Rust Inhibitor
After you’ve sanded and cleaned the edges, use a rust inhibitor or cover with anti-rust paint to stop the bare metal from corroding in the future. It’s also advisable to coat the back of the new rocker panel using a rust inhibitor.
5. Mark and Bore Holes
If you’ll be fastening the rocker panel using rivets, mark out uniformly spaced holes for the rivets. Generally, every two inches are enough. However, it differs depending on the intricacy and shape of the rocker panel.
Ensure that your rivets are around one inch away from where you’ll be laying your weld bead to mount the slip-on panel to the current rocker if you would like to weld the slip-on rocker panel. Bore 1/8-inch holes on the markings using your handheld drill.
Before you begin drilling, ensure that your slip-on rocker is precisely where you would like it to be or your new panel won’t fit well. In this part of the process, using clamps can help. Alternatively, you may have someone else to hold it into position as you drill.
6. Smoothen out the Edges of the Drilled Holes
Smoothen out the drill spurs on the backside of the slip-on panel and the edge of the truck using a flat disc mounted to the grinder. It stops the metal from bulging outwards along the edge of the holes and making it tricky for the panel to fit into position. Then, apply engraving primer onto the uncovered spots on the panel.
7. Mount the Rocker Panel onto the Truck
Using fasteners or adhesive, mount the slip-on panel to the truck. The best of doing this is beginning from the center and work your way towards the edges. If you want to keep the panel from switching positions, doing each third or fourth hole and then stuffing in the holes in between will help.
Modifications and Final Touches
If your panel isn’t aligning at any point along the rocker’s length, use hammering tools to convince it to fit into those spots. However, use this as a last recourse.
Apply any sand, prime, and filler as required. At the base of the panel, apply an undercoating. To ensure that the rocker panels match with the truck’s color, paint them. The paint and clear coat can be applied professionally by an expert if you prefer that. It depends on the quality of the finish you want.
Factors that Affect the Durability of the Slip-On Rocker Panel Replacement
The below factors affect the longevity of the slip-on rocker panel replacement.
Panel Strength
When replacing slip-on panels, the repair work’s value largely relies on the panel’s quality. Can the slip-on panels endure a continuing stream of rain and exposure to road salt, or will they quickly yield to the corroding problems that damaged the older rocker panels?
Can the panels deal with everyday wear and tear? When it comes to durability, what matters most is the quality of the repair task and the potency and thickness of the given set of slip-on rocker panels.
Safety of the Installation
As stated above, the success of the task relies primarily on the quality of the work done. If a slip-on panel isn’t properly attached to the truck, rivets and screws may pop out if the vehicle flexes and turns when used normally.
Depending on the installation, each type of panel can be strong or weak. Nevertheless, slip-on panels are naturally predisposed to loosening, particularly if you drive your truck on rougher terrain.
Rust Resistance
The whole point of purchasing and connecting a new set of rocker panels is to free your truck from hopelessly corroded or damaged body panels. Nonetheless, if the new panels also corrode within a couple of years, the money that you used in the installation procedure would amount to little in the end.
To get the most out of rocker panel repair, ensure that you don’t leave your new panels susceptible to similar corrosive elements. Irrespective of whether you get welded or slip-on rocker panels, make sure that you treat the surfaces using an anti-rust formula regularly. Better yet, repaint the undersides yearly to fend off the effects of salt and water.
Using the right application methods extends the truck’s lifespan. For instance, if you use aluminum rivets rather than steel, it’ll rust much sooner.
Resale Value
Although it’s not directly related to durability per se, slip-on paneling can influence a truck’s resale value. Depending on the installation quality, it can be a good or bad thing. If you opt to install the new rocker panels and maintain them well, they can improve the resale value of your truck.
However, if you install slip-on panels poorly, it’ll degrade the value of the vehicle. If you want to get new panels for performance, but don’t want to sell the truck, then you don’t require an esthetically flawless installation. You only need one that’s safe.
Nevertheless, if at some point you’re planning to sell the truck, ensure that the new panels mix in with the rest of the vehicle’s body.
- See also: How to Weld Plastics
Conclusion
If your truck, jeep, or SUV has rusted or damaged rocker panels, replacing them by yourself is an effective method of resolving those issues.
In this article, we’ve compiled everything you need to know about slip-on rocker panel replacement. If your rocker panels have been damaged through corrosion but not any other disfiguration, particularly at the base and upper edges, slip-on rocker panels are the best bet.
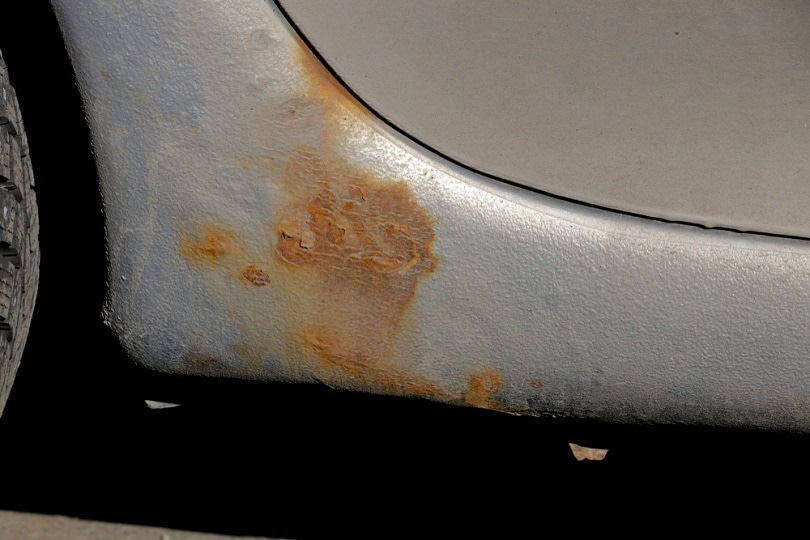
Featured Image Credit: Ville Tulkki, Shutterstock